Dual radio POTA activation? Sure!

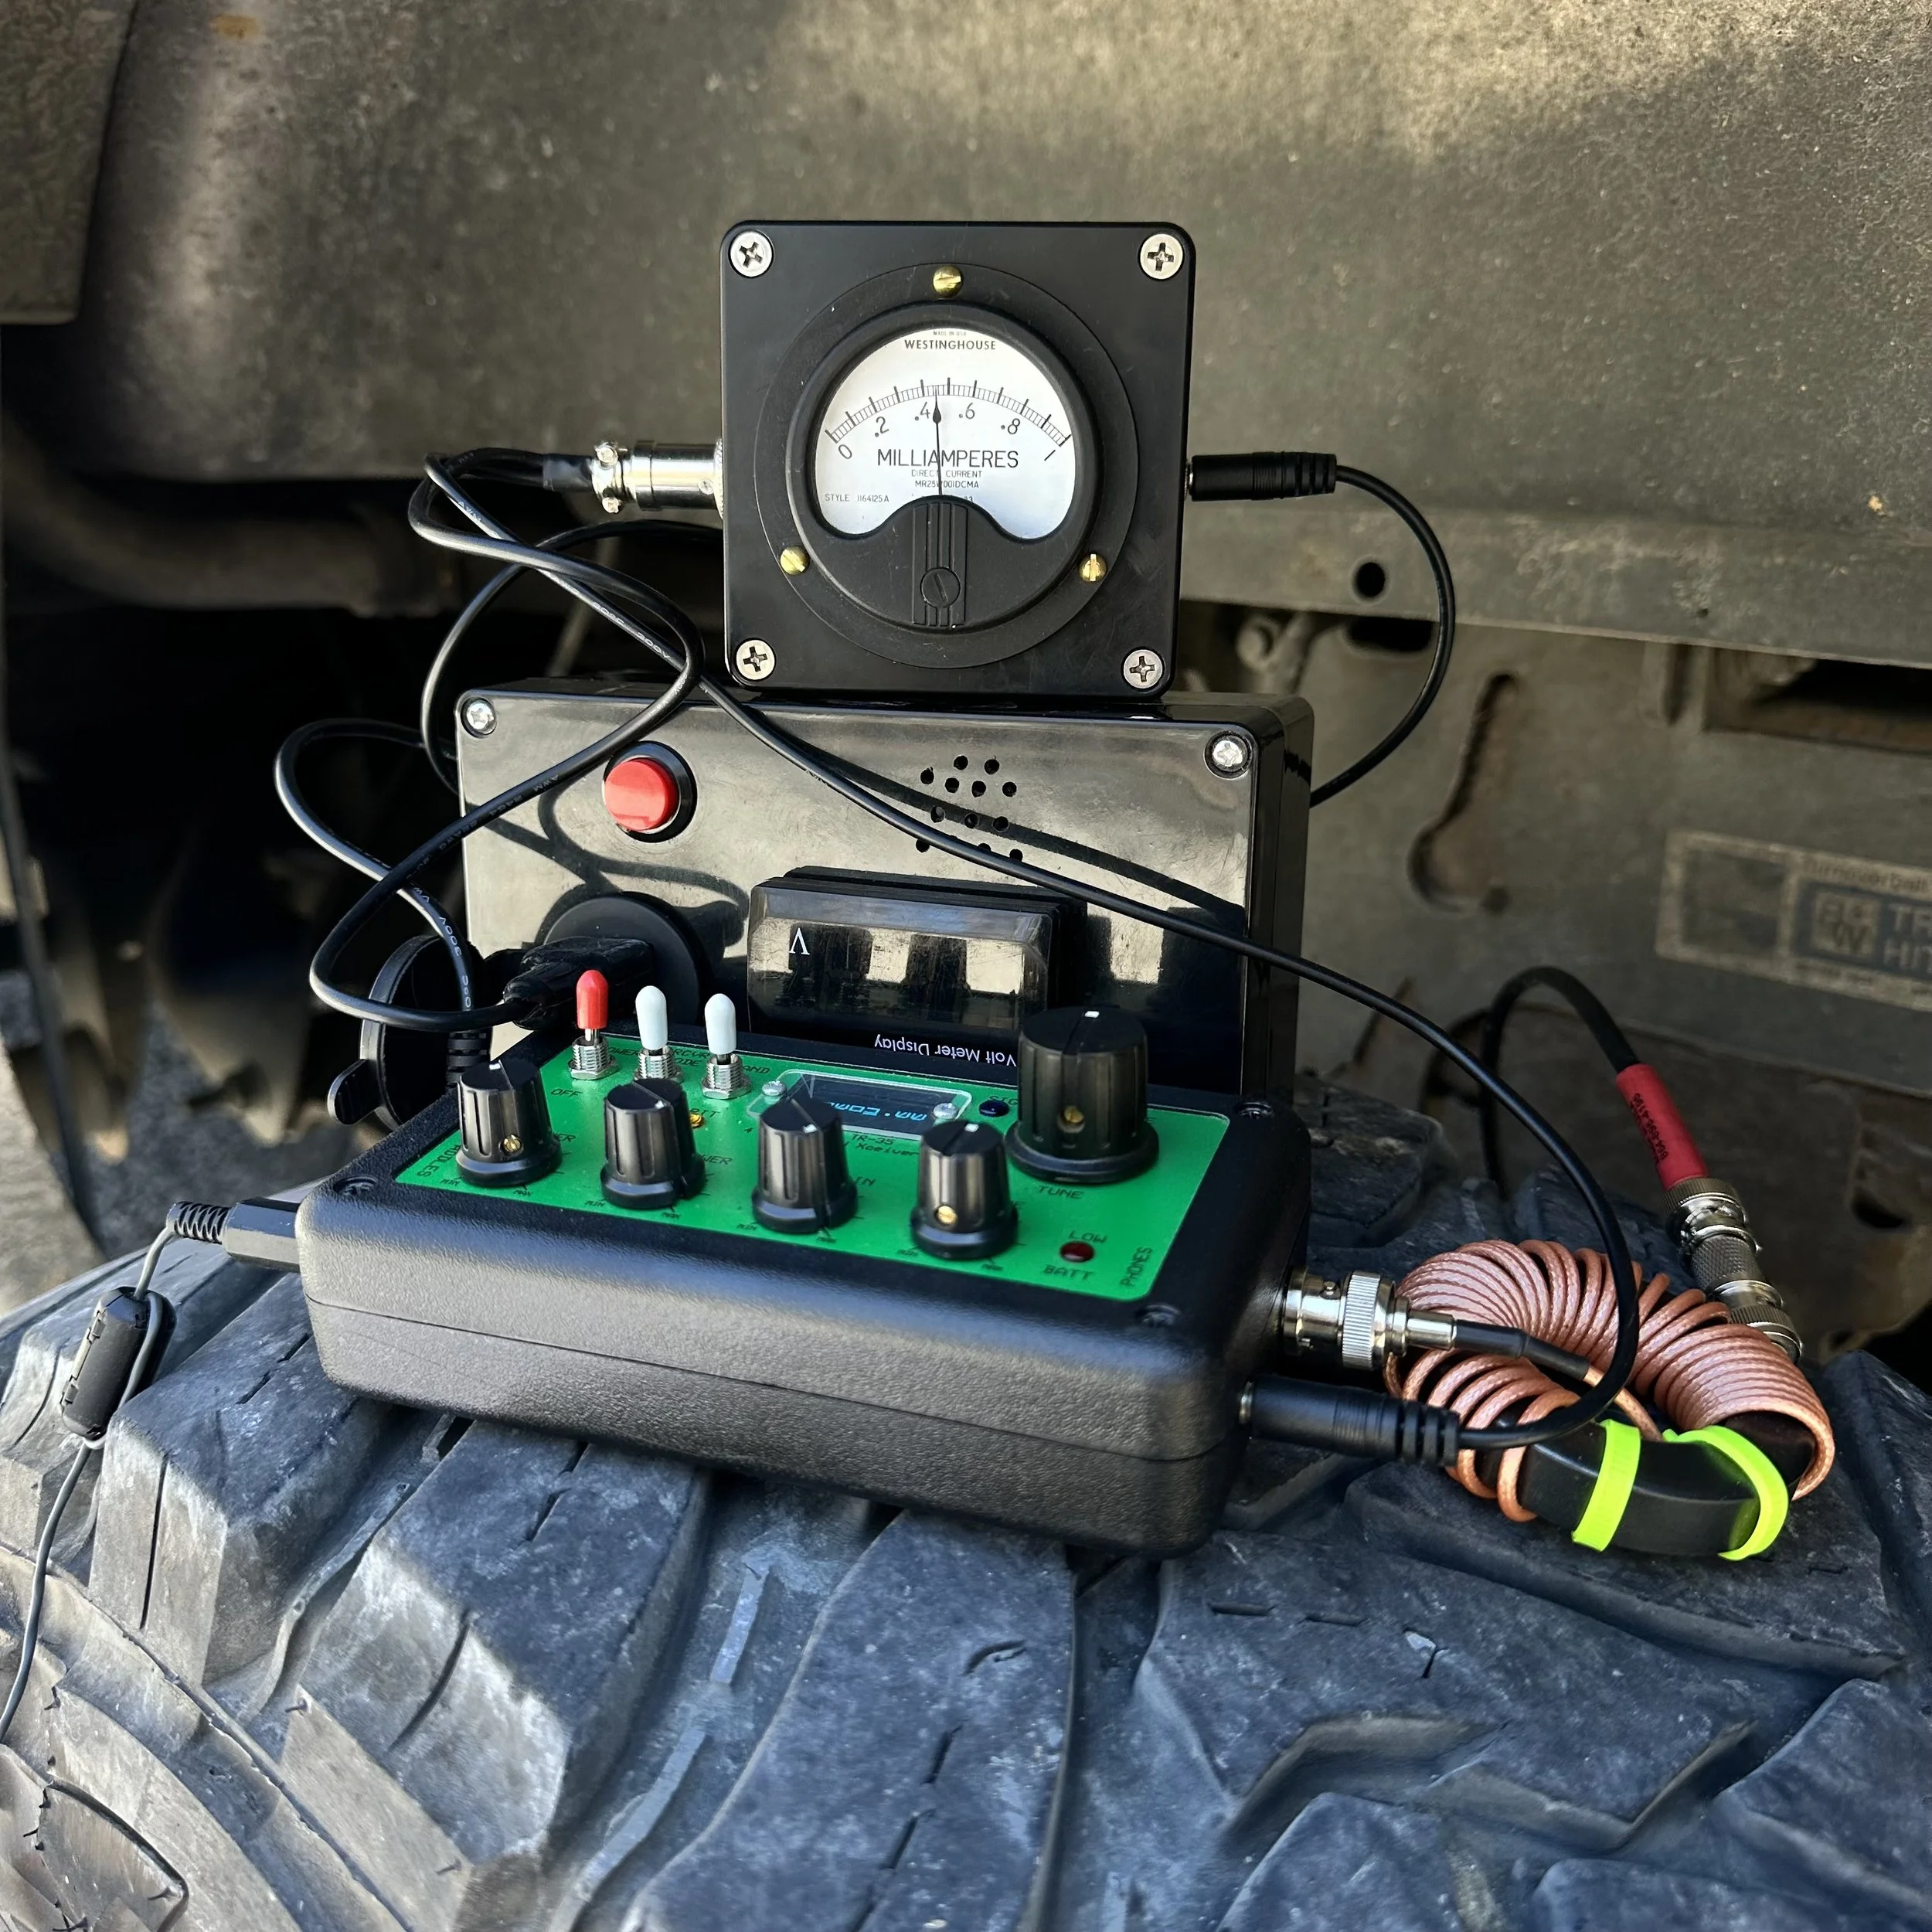
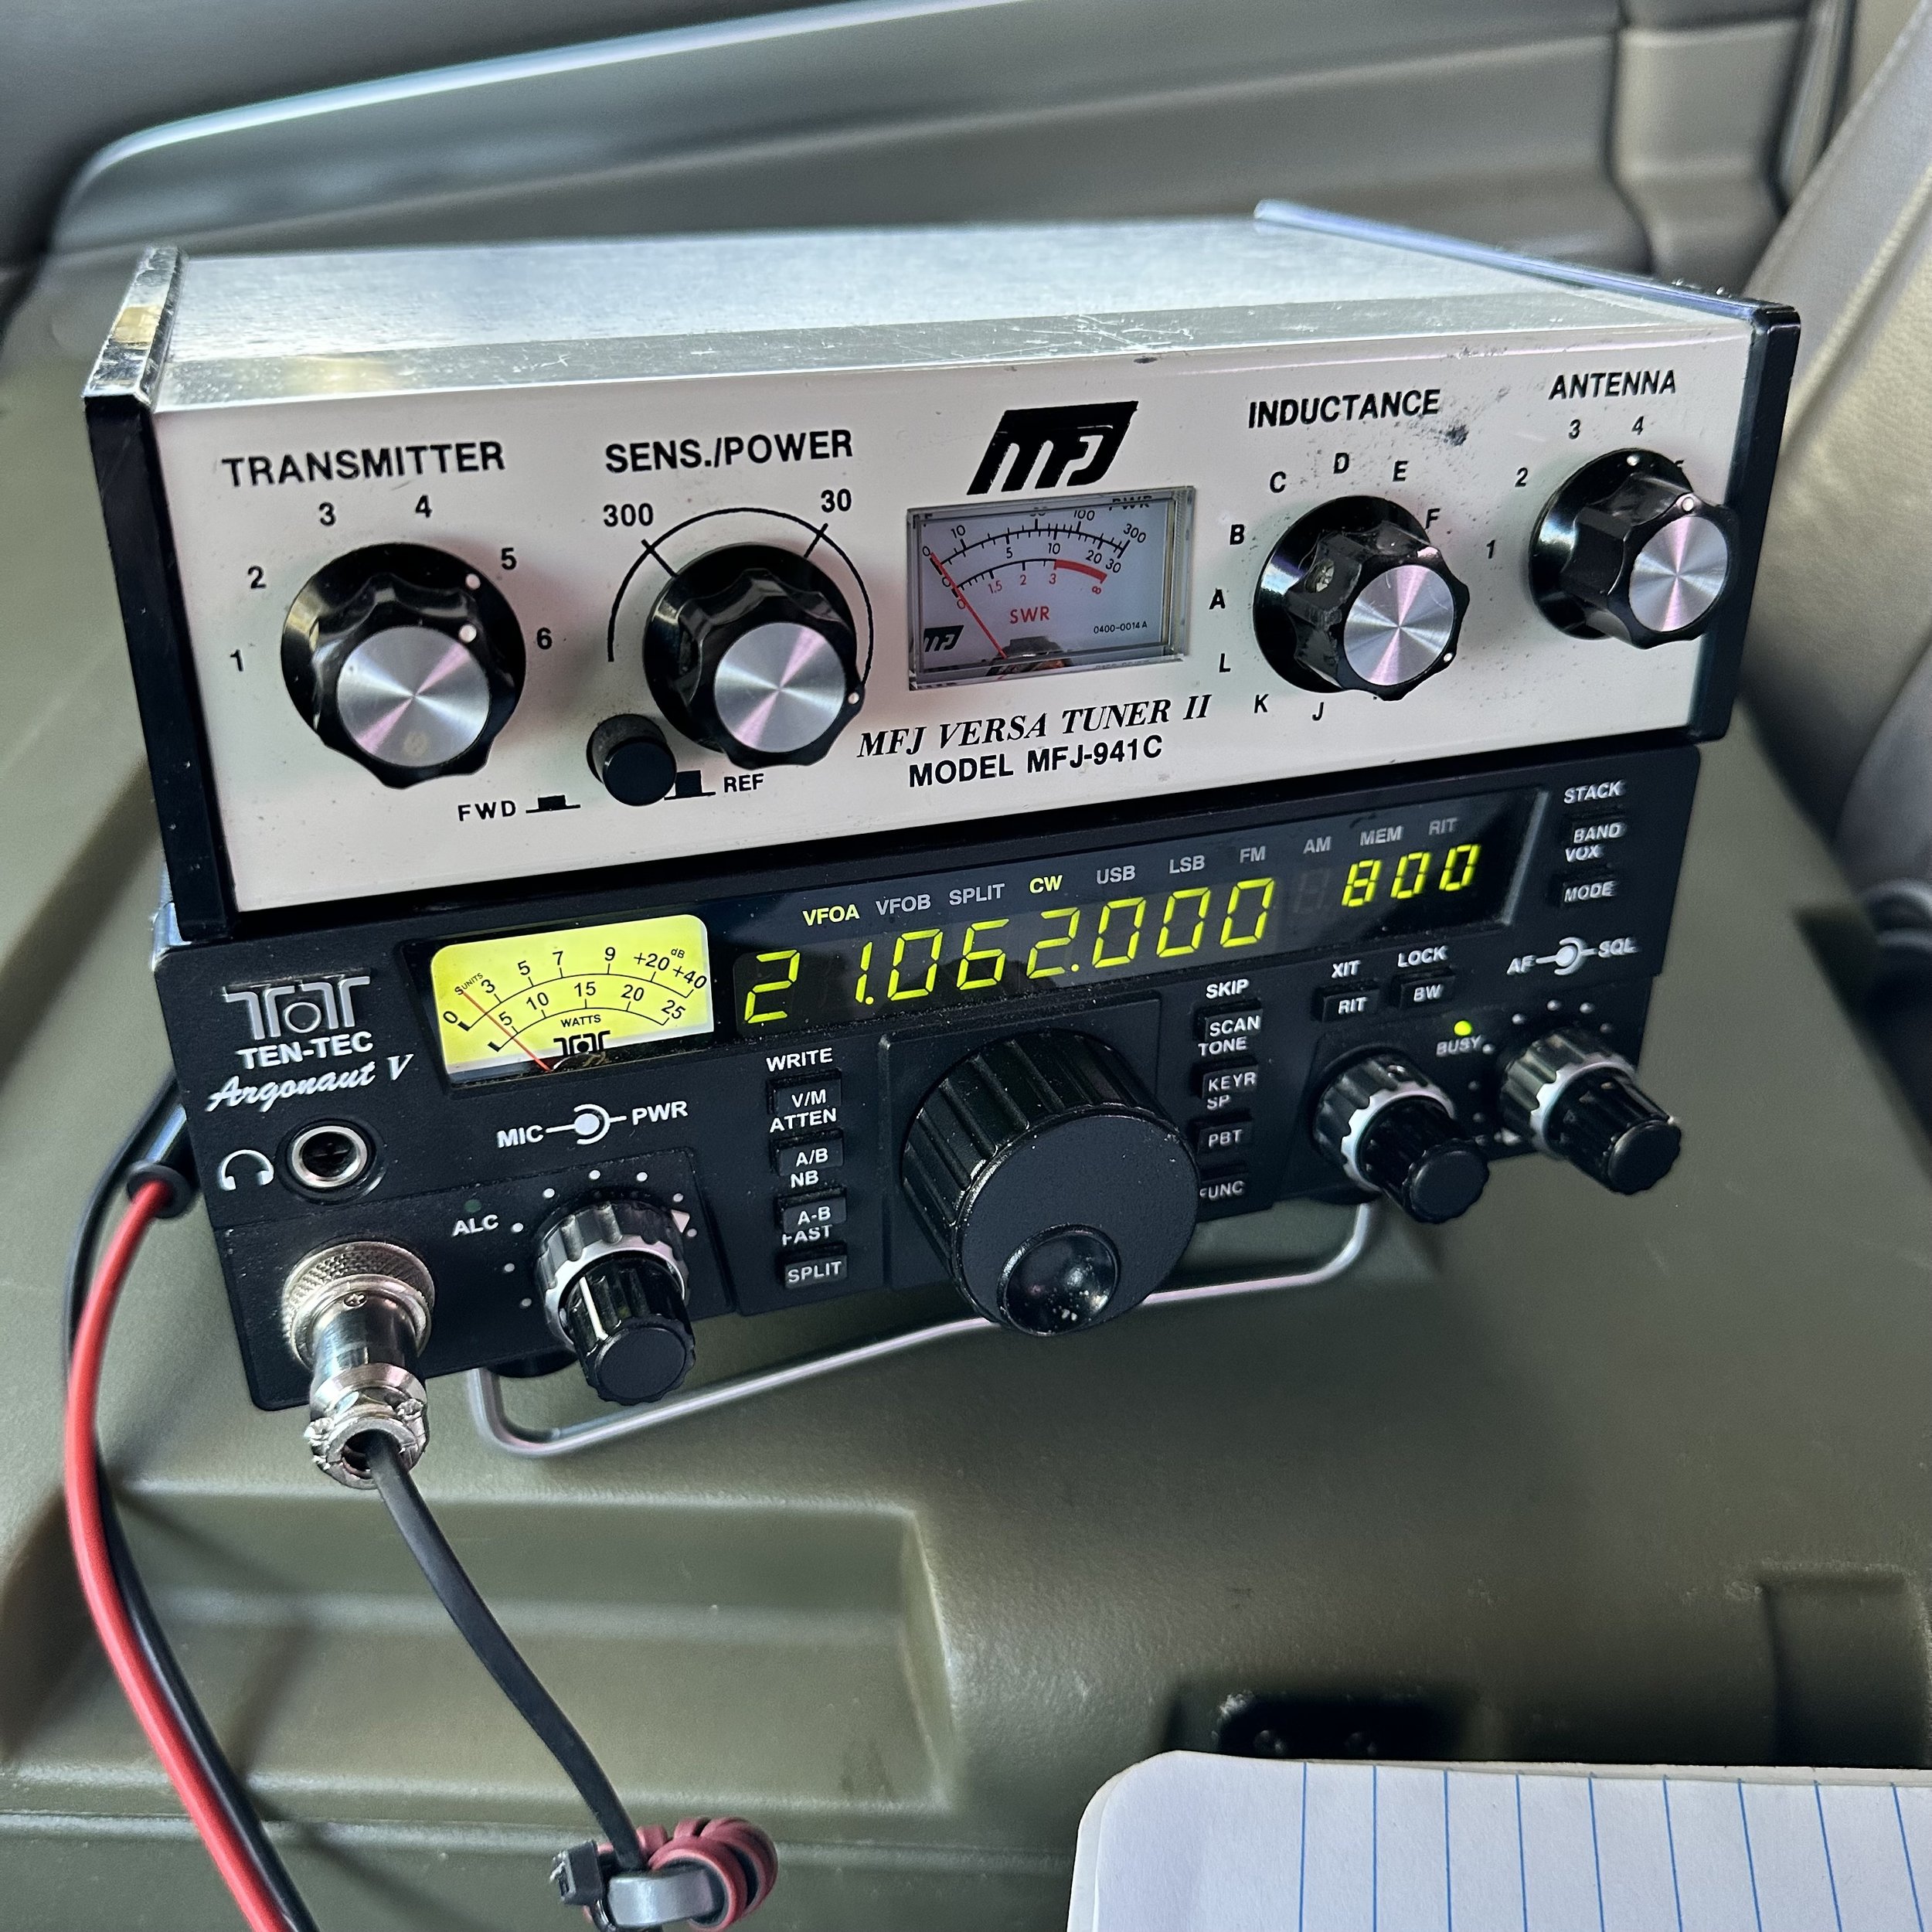
Today I setup both the Ten Tec Argonaut V as well as the sBitx V3. This was because i was not sure if the sBitx V3 would hold up the entire time. You see, it has had an ailing 5 volt regulator for a while and I was planning on replacing it later today, but first… POTA!

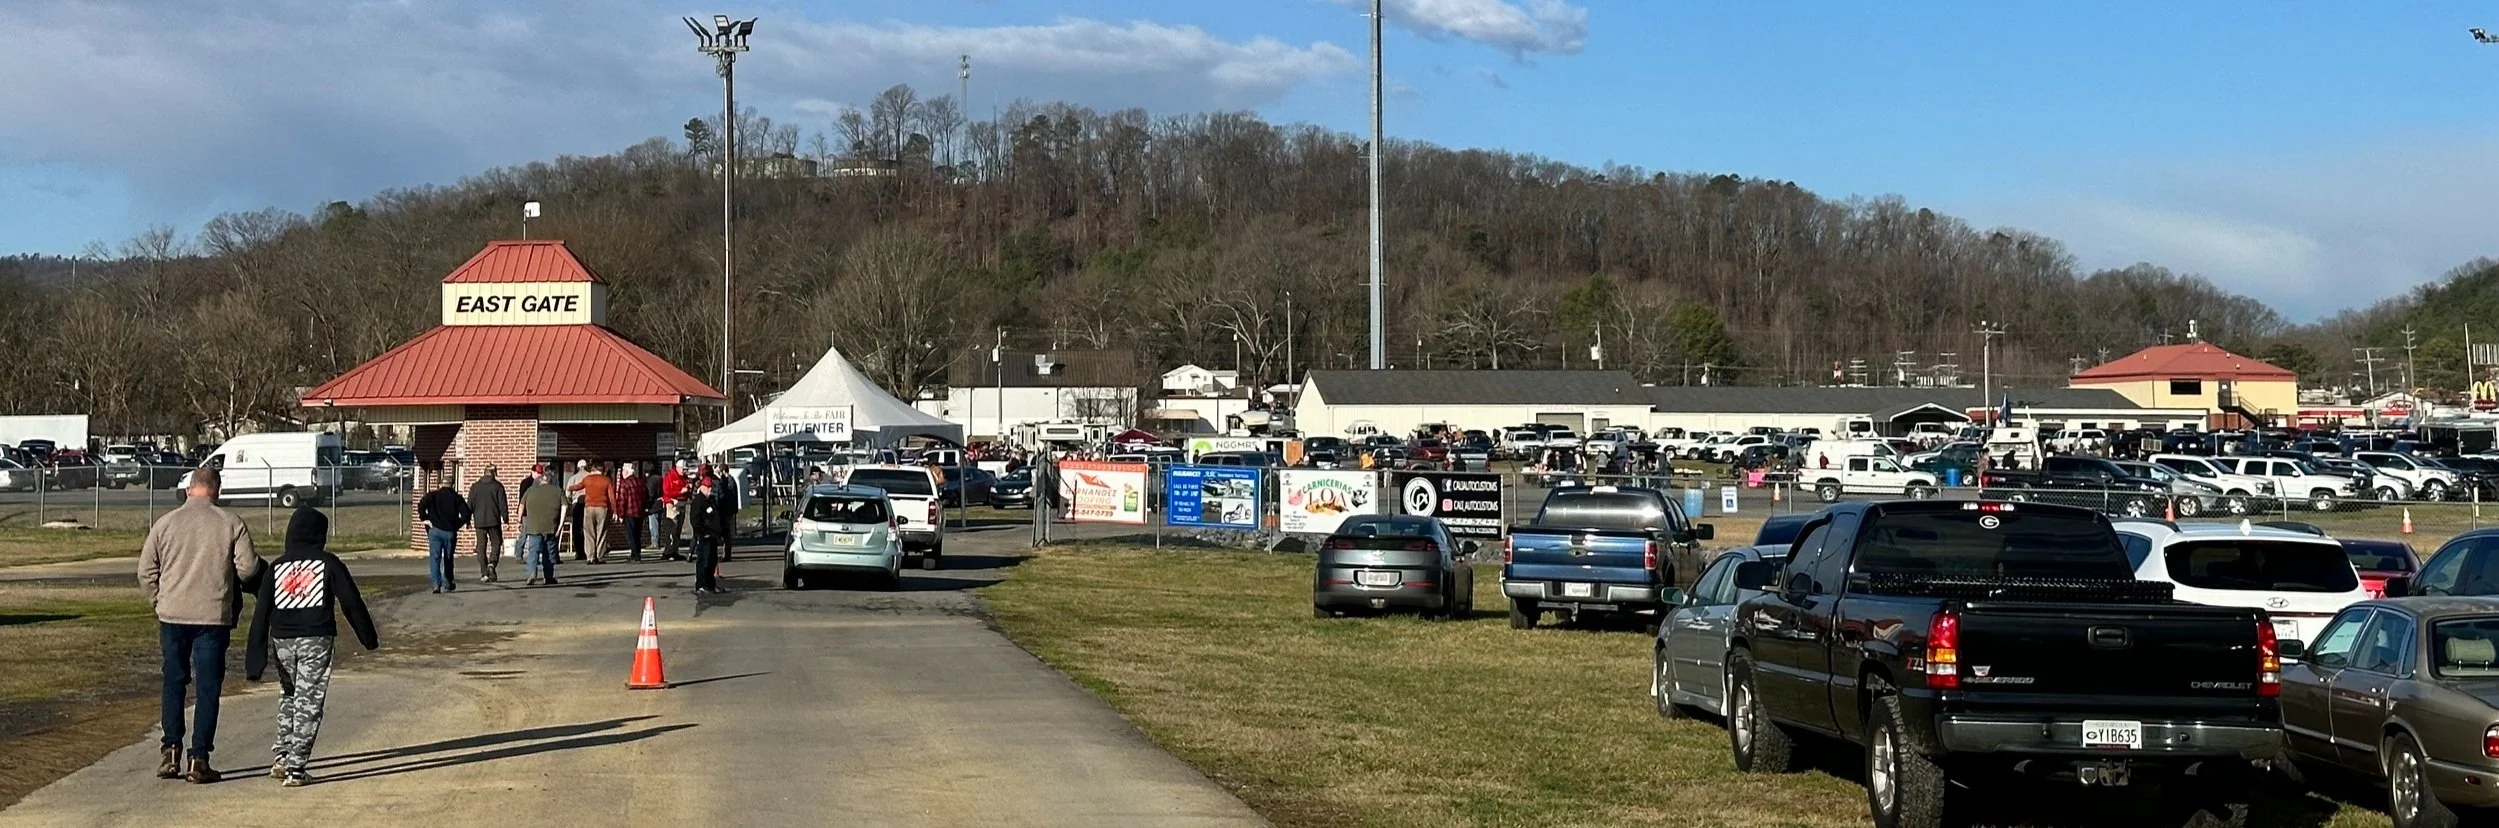
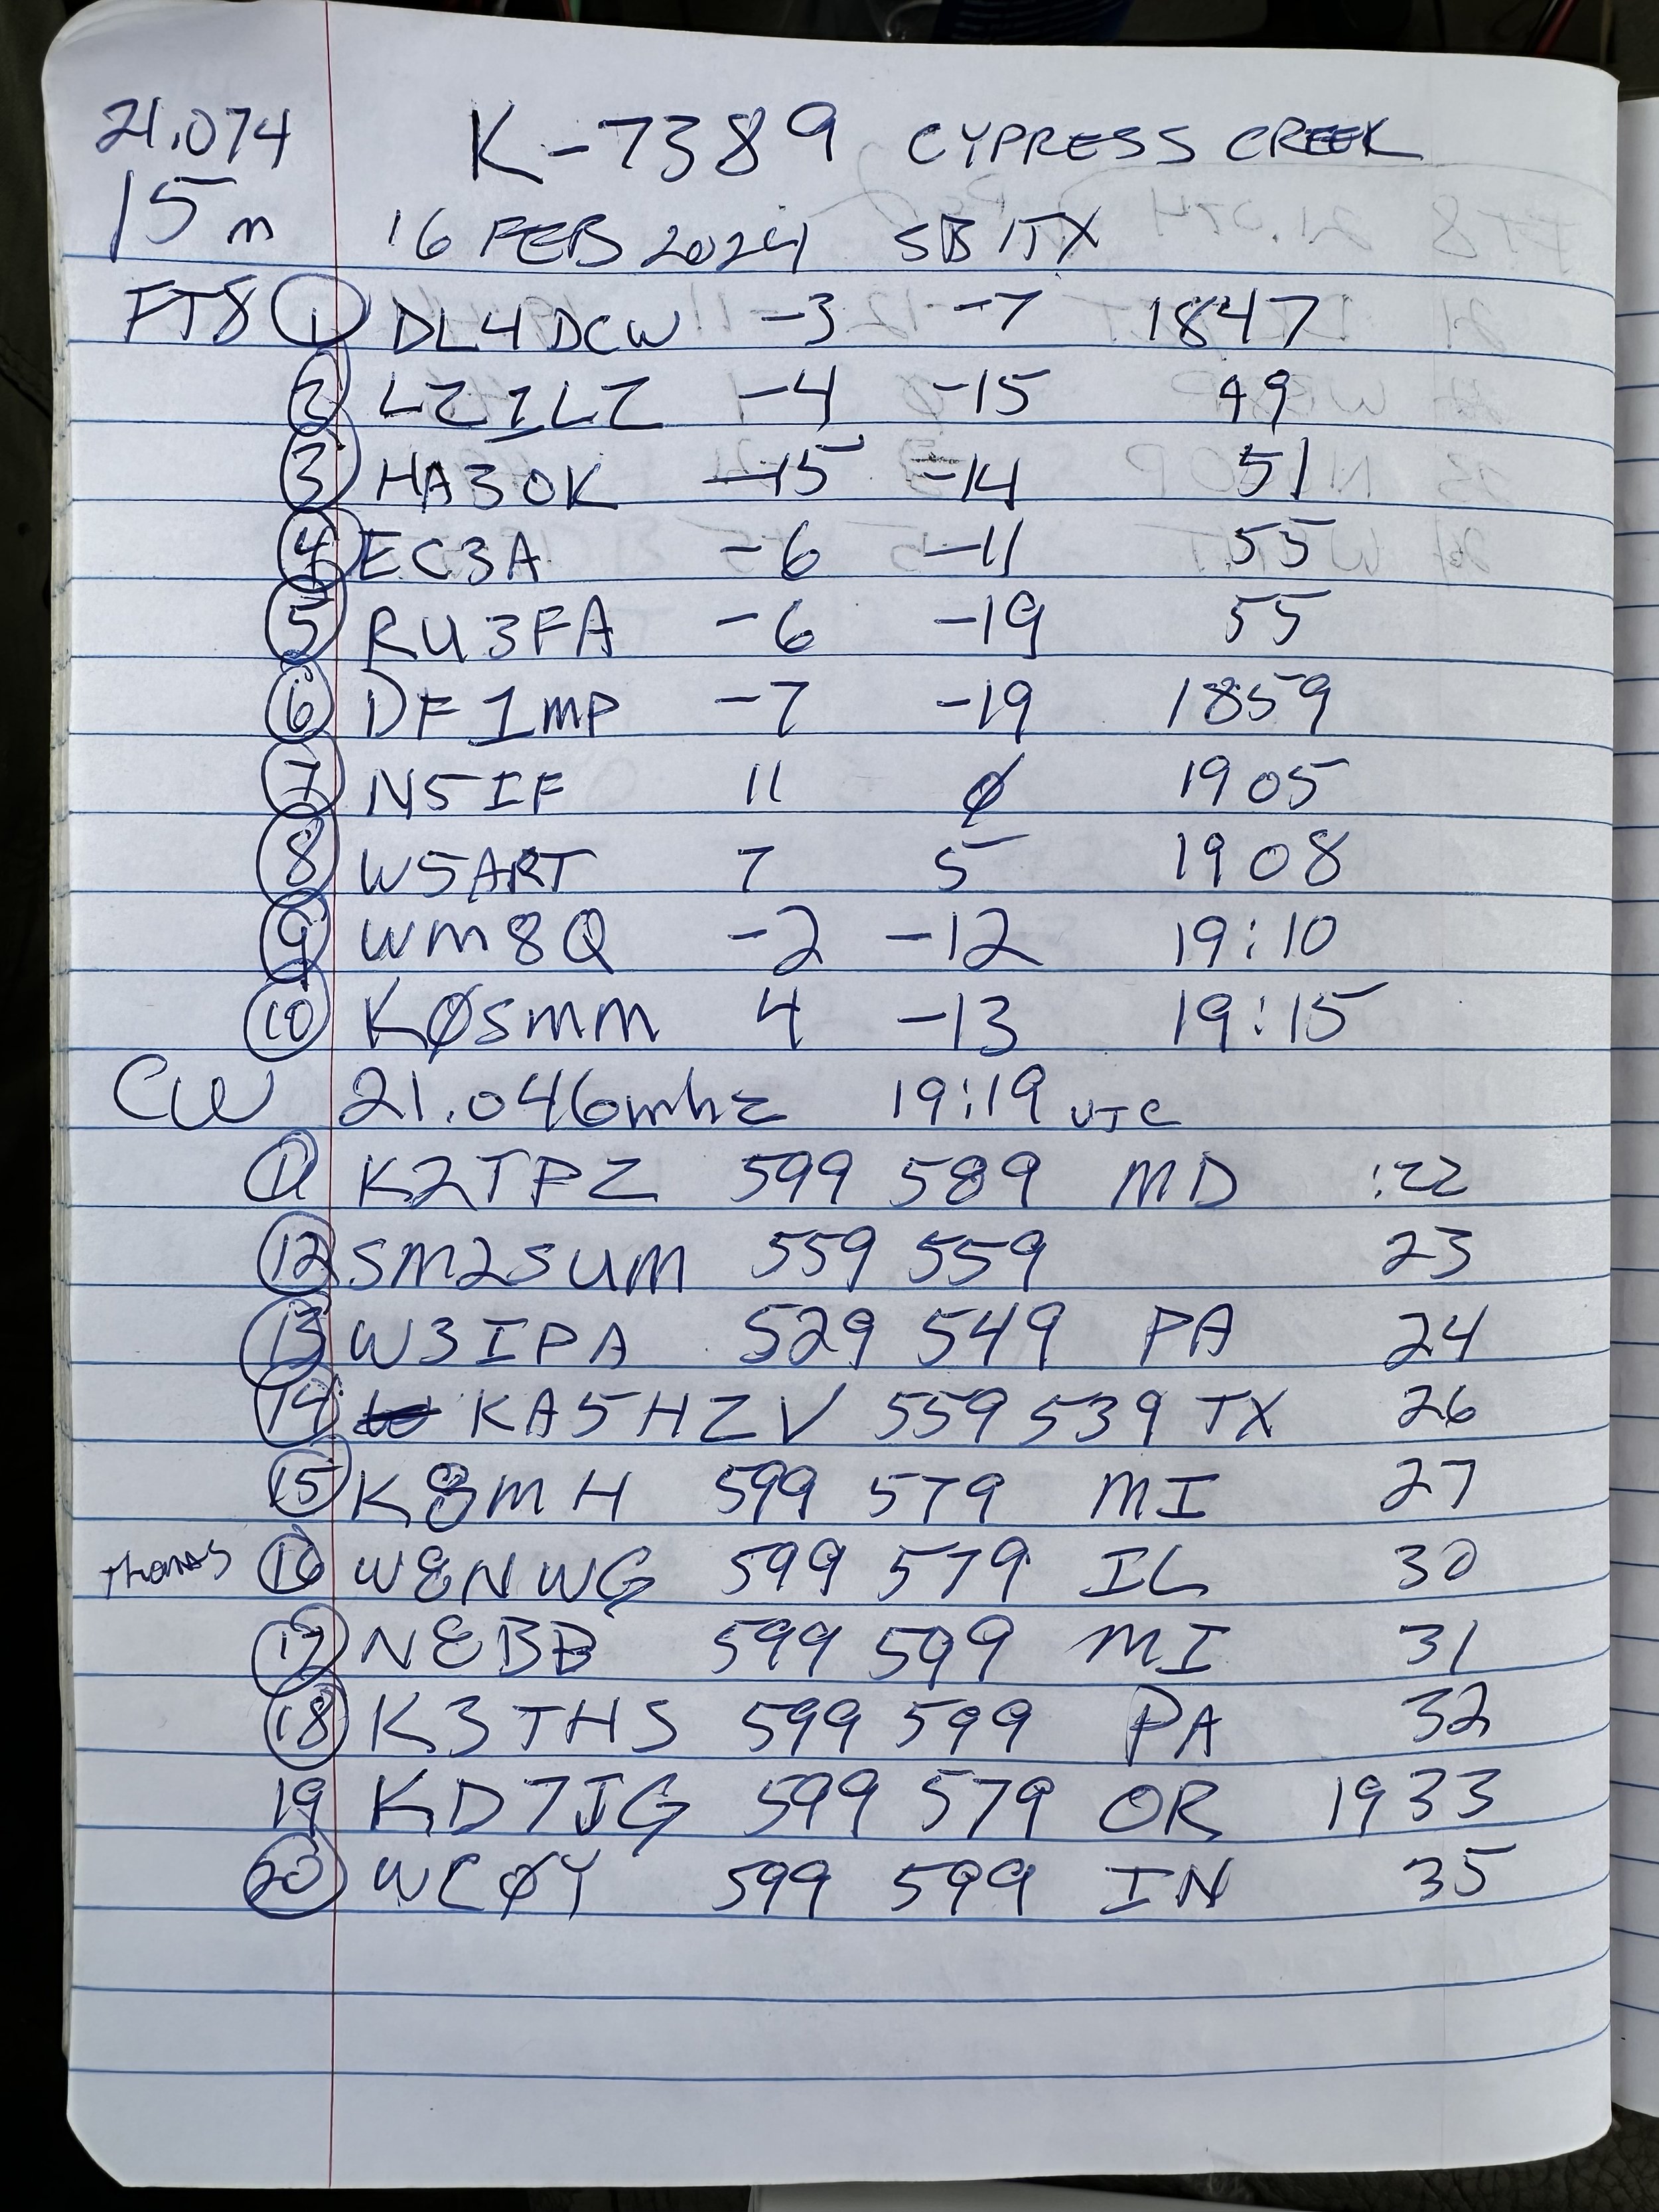
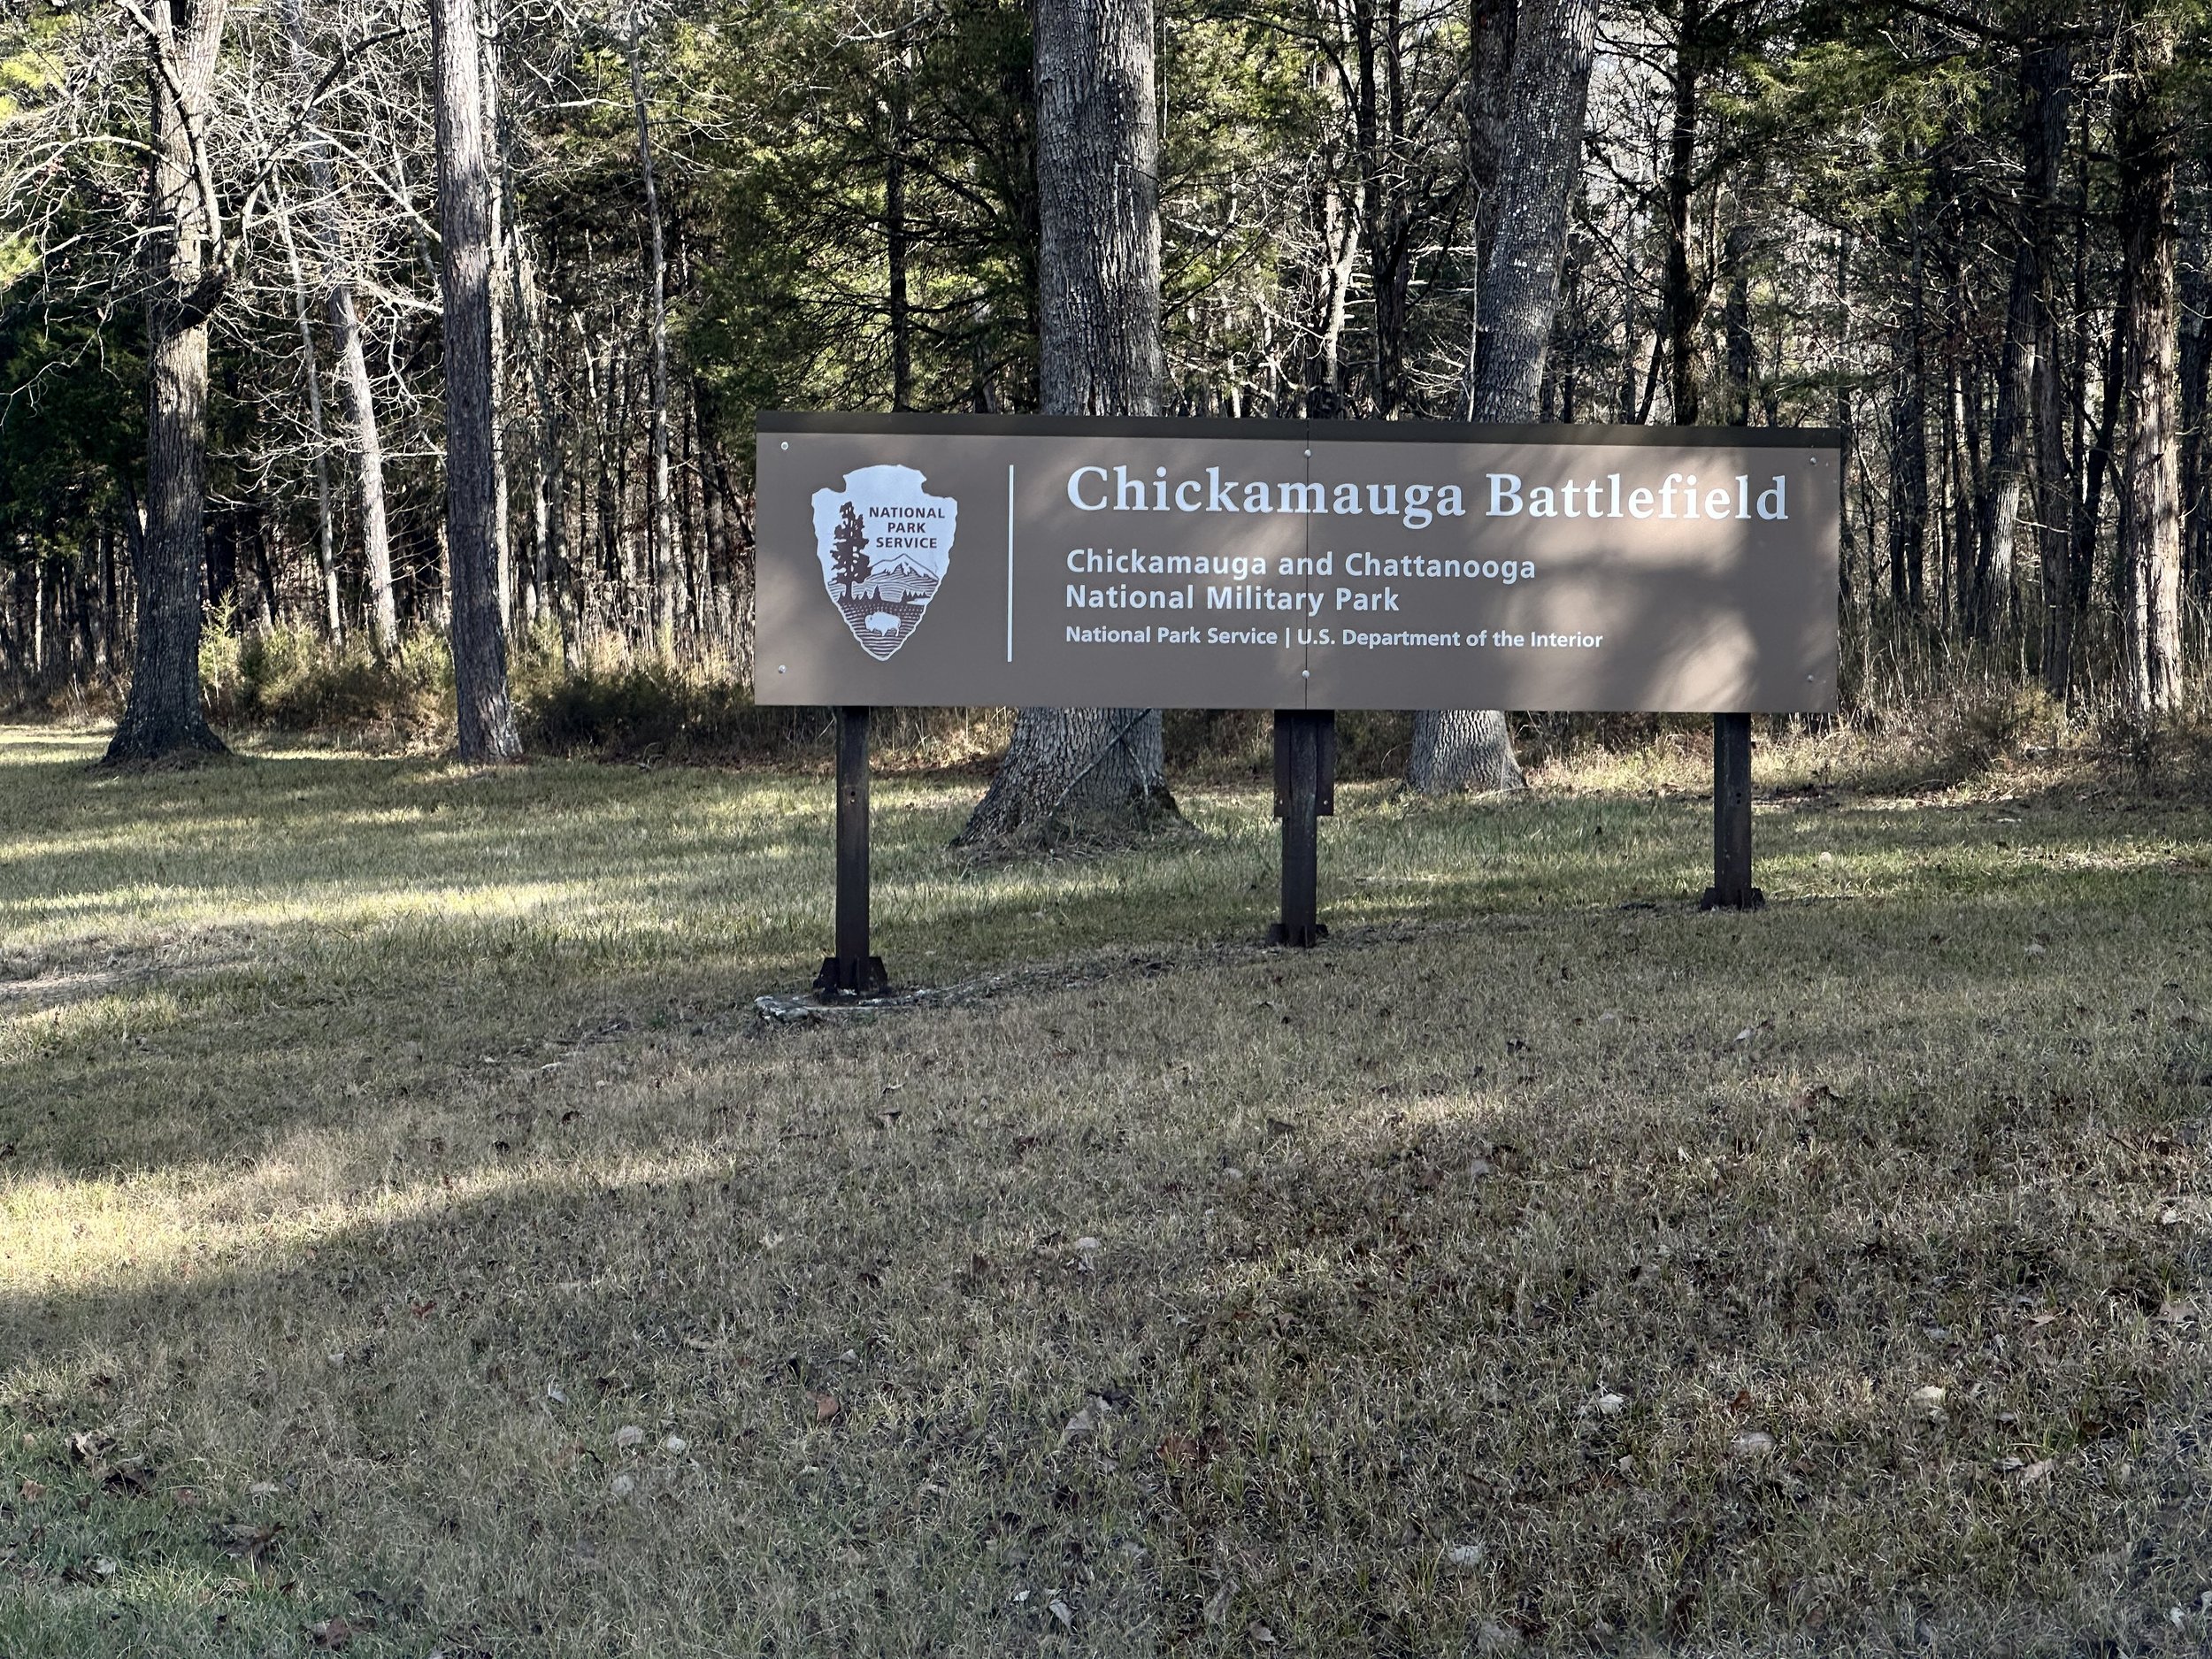
So I go to US-2169 and setup in my usual spot and get out both radios so that I can work CW on the Ten Tec if the sBitx flakes out on me. It didn’t, but since I had already gotten it out, I used the Ten Tec Argonaut V anyway and worked what CW I could with it. You see, today was another day that I stayed above 20 meters the entire time. That was the plan from the outset and it was quite successful too. I love using 15 meters in particular since it goes over seas easily for me. I will usually work several DX stations if the band is open and today is no exception. I worked 5 DX stations over an 18 minute span of time, not bad for a 15 watt radio… I worked so much FT8 is short order that I almost didn’t need to setup the CW station at all, but I wanted to work some CW anyway so I just got on the air with it and this is how it went.

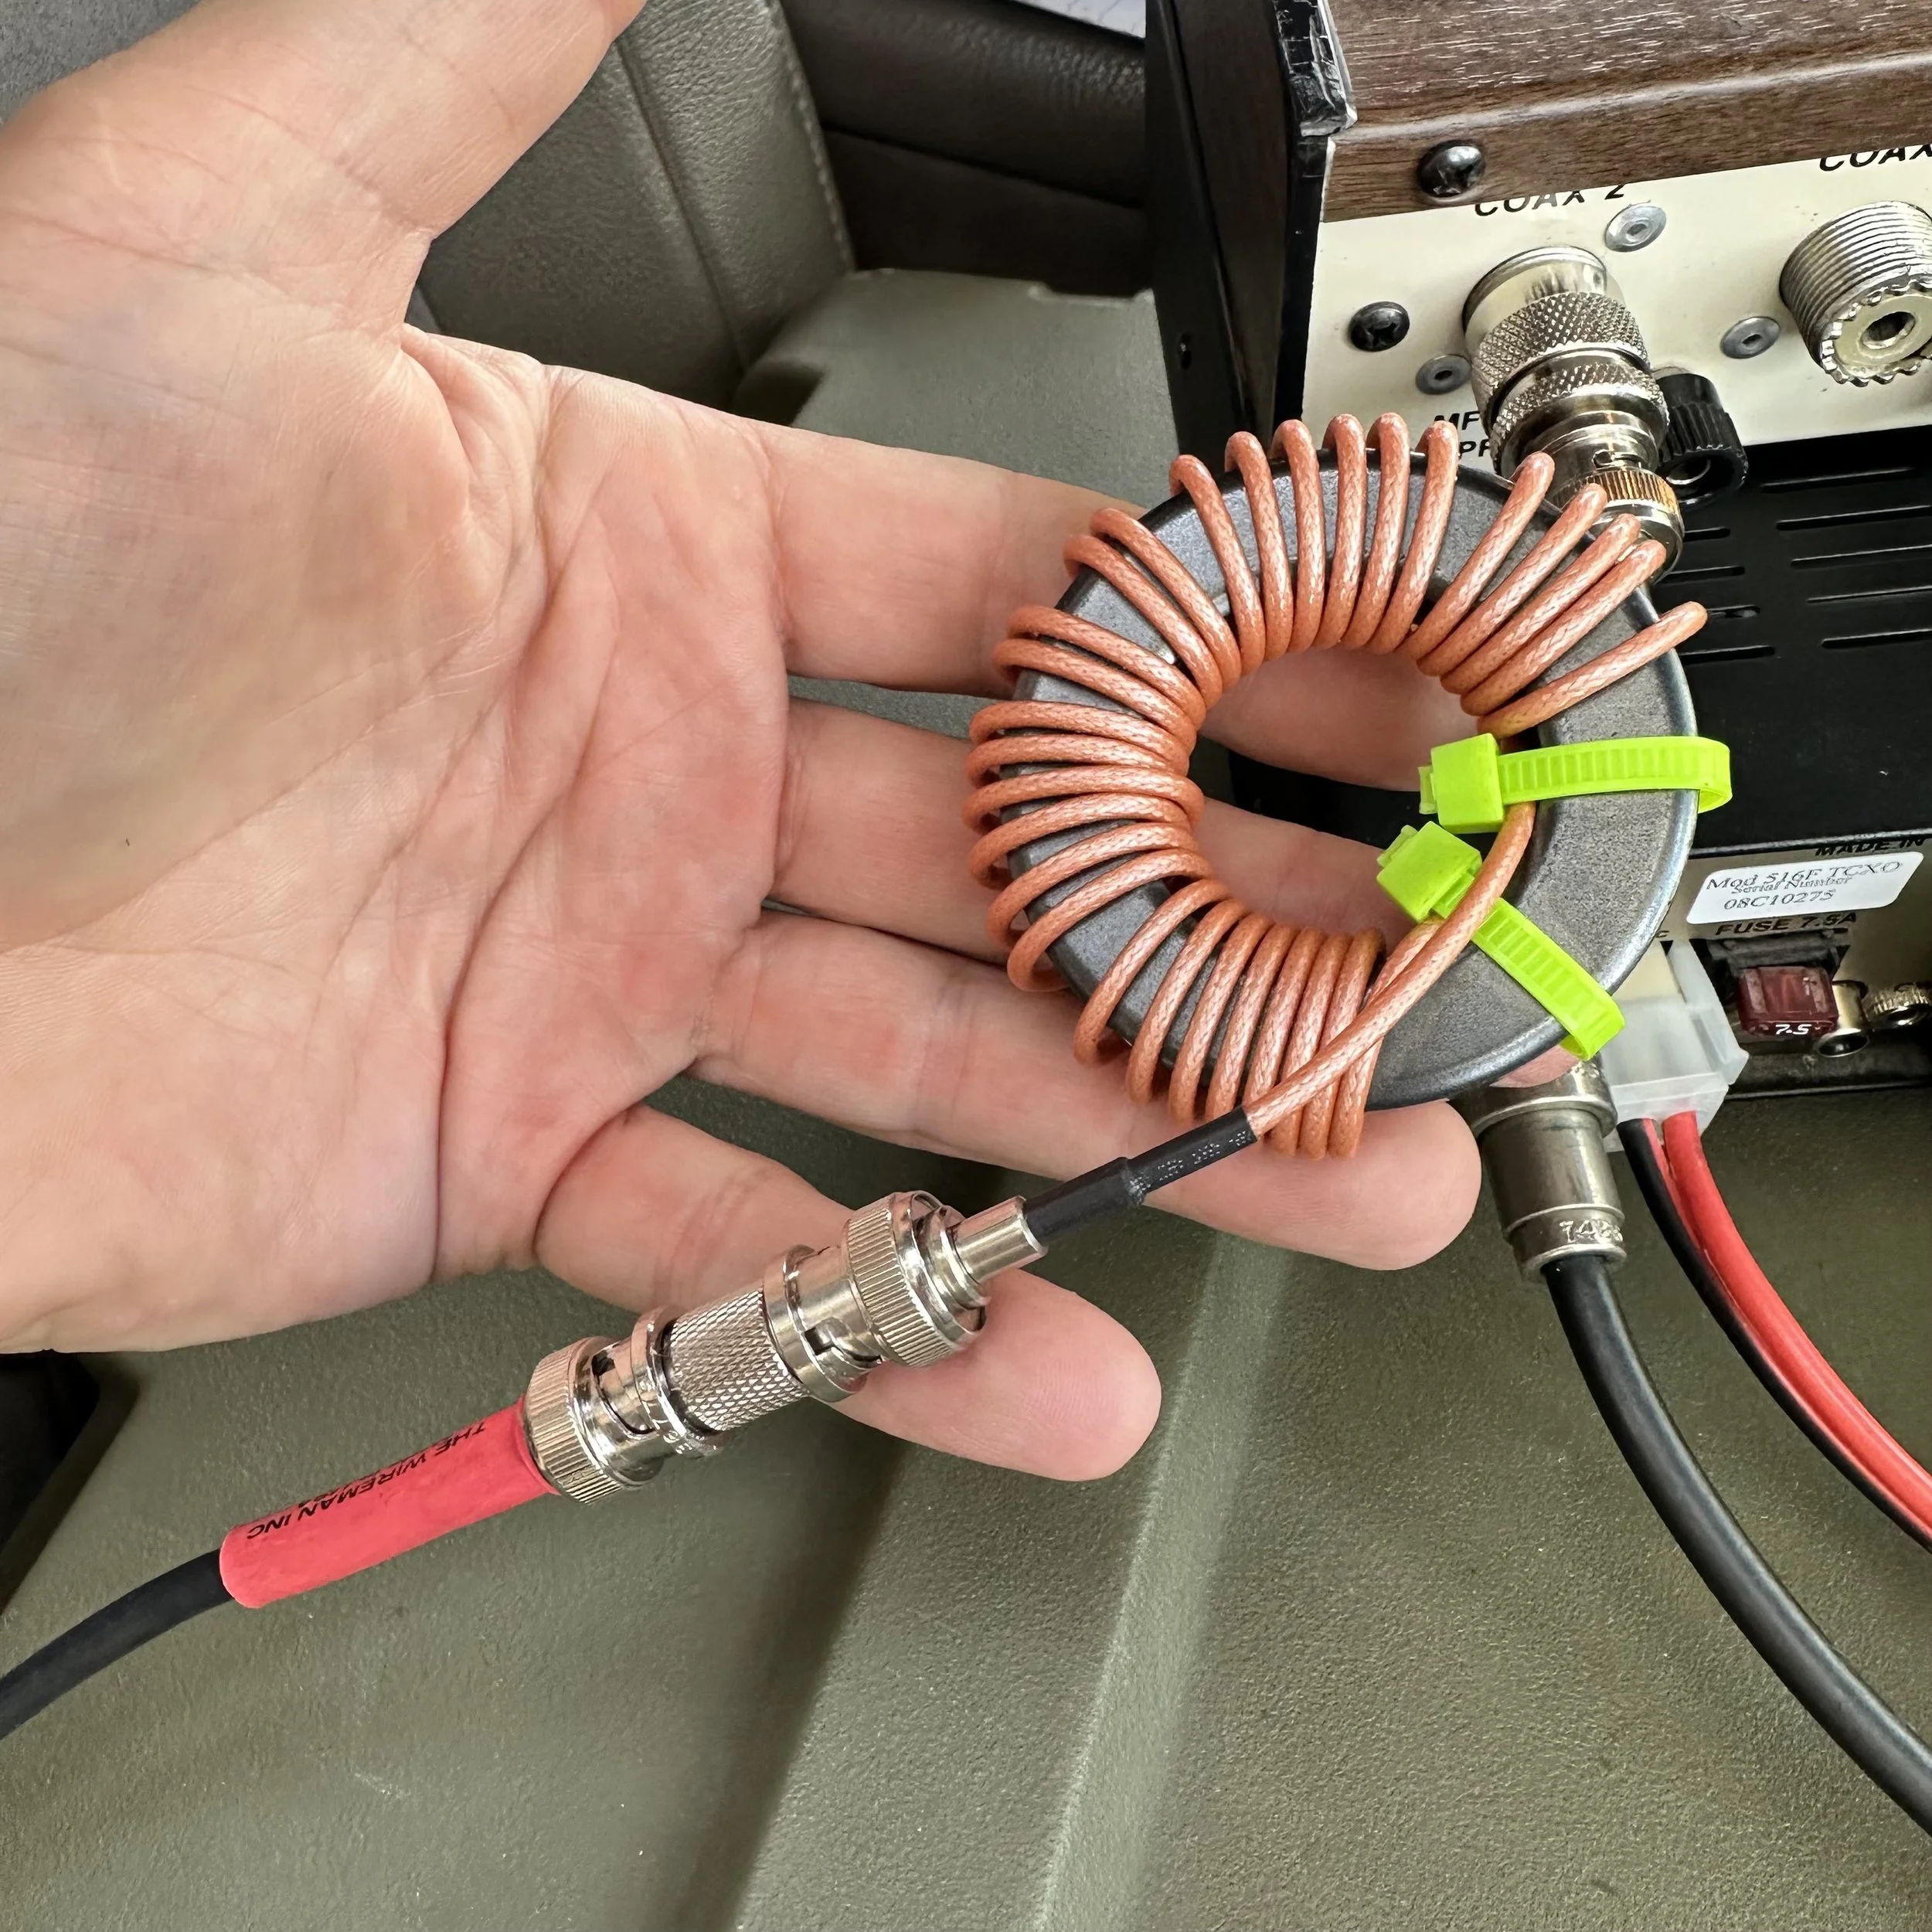
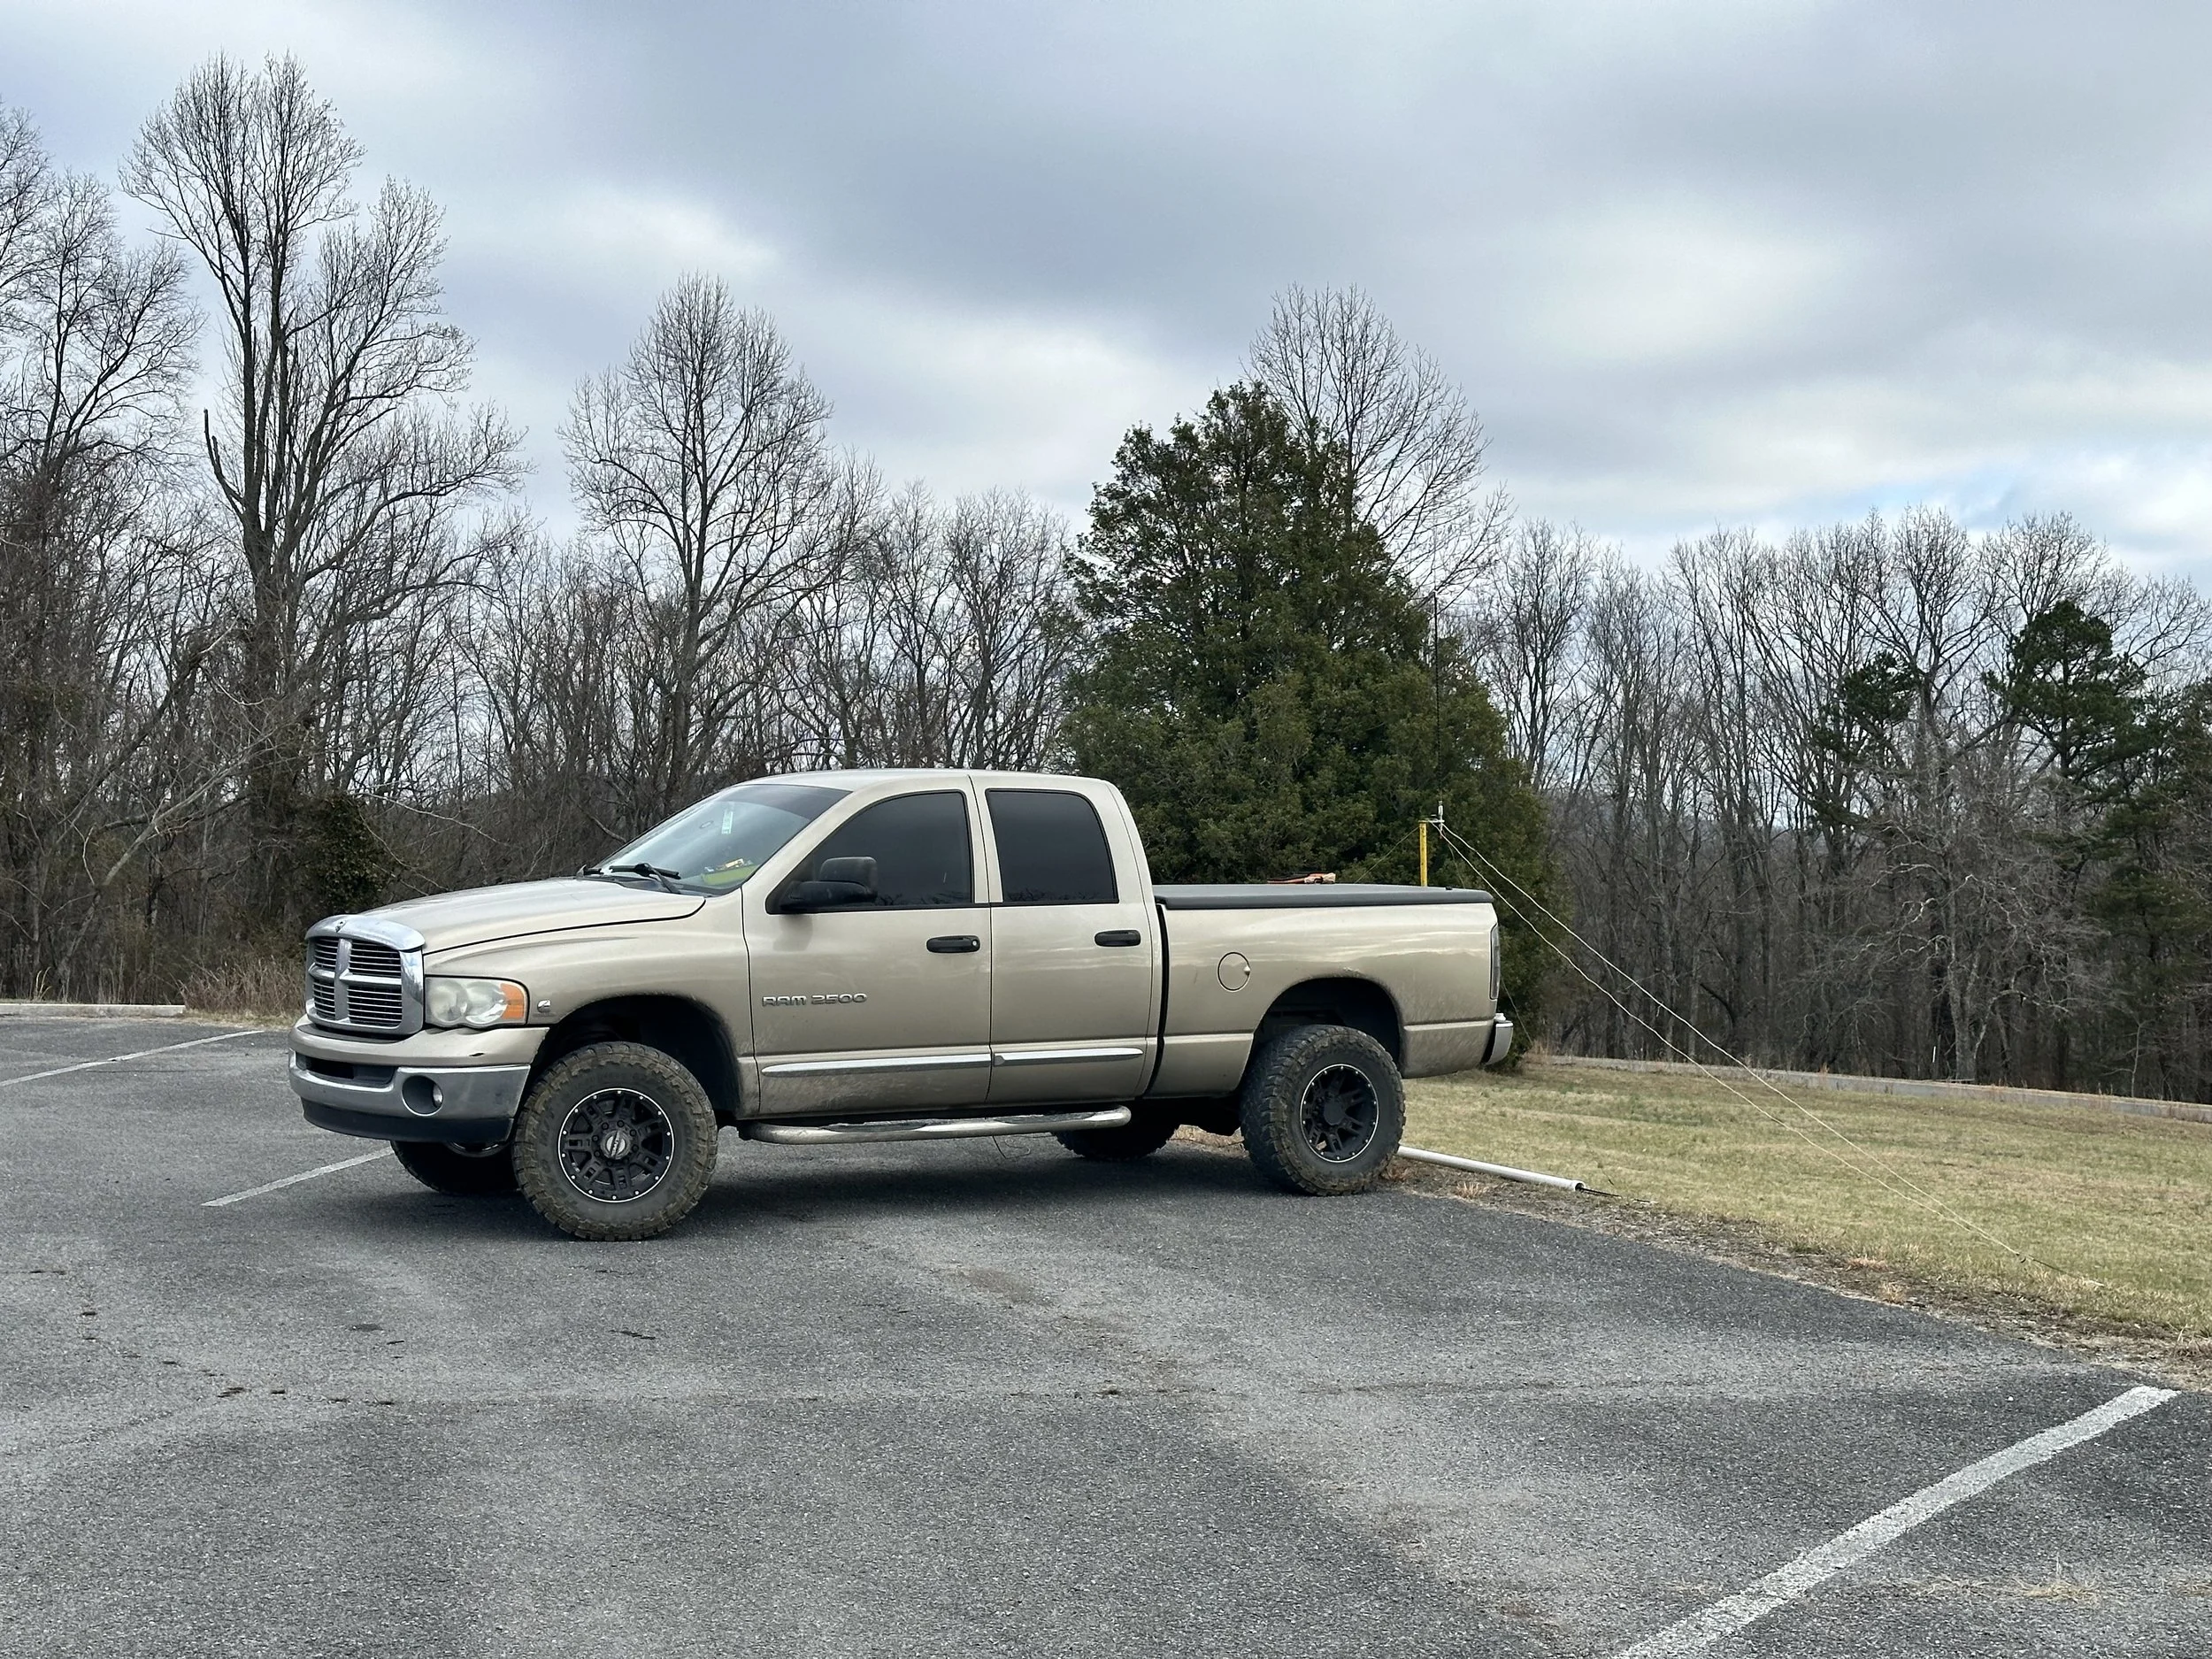
The operating position was a little crowded today but not too bad, I used the hard case for the Ten Tec Argonaut V as a table of sorts to sit the radios on so I was able to move them back and out of the way of my writing surface. This left plenty of room for the nanoVNA and my other small items I use when activating a park. I have gotten really comfortable with setting up like this, I can set this up in just minutes and it requires zero use of the park infrastructure (such as trees or picnic tables) over the parking space I would consume either way and some space for my radials.

So in a previous blog post I had mentioned that I was going to use the smith chart on the next outing to show how you get way more information about the antenna under test with it instead of the simple SWR graph and here it is. Contained below is the 15 meter plot from 20.5mhz to 21.5mhz and the marker is resting at the upper limit in the photo. The center line across the chart is purely resistive measurements, anything above this line is inductive and anything below this line is capacitive in nature. As you can see on the display, the line representing the span I am looking at, 20.5 to 21.5mhz, is all above the line showing that my antenna system is inductive in nature so it will have some inductive reactance to the signal. The very center of the chart where the smaller circle intersects the line is 50 ohms - resistive (right below the flag from my measurement). As you can seem the further you move away from this point, the further from 50 ohms you get.if it were to be something like 100 ohms, you would need a 4:1 transformer to correct the impedance mismatch, this is why antennas need transformers. The characteristic impedance of the antenna is not usually 50 ohms which is what the transmitter is designed to see.

In the second photo I have switched the chart over to a simple SWR plot versus frequency and you can see how it is easier to read for the lay-person. It does give you the data you need in the firld really quickly and make it easy to know if your antenna is short or long and if your radials are good to go and such. This is what i use most of the time in the field to just make sure the antenna is presenting a good load to the transmitter.

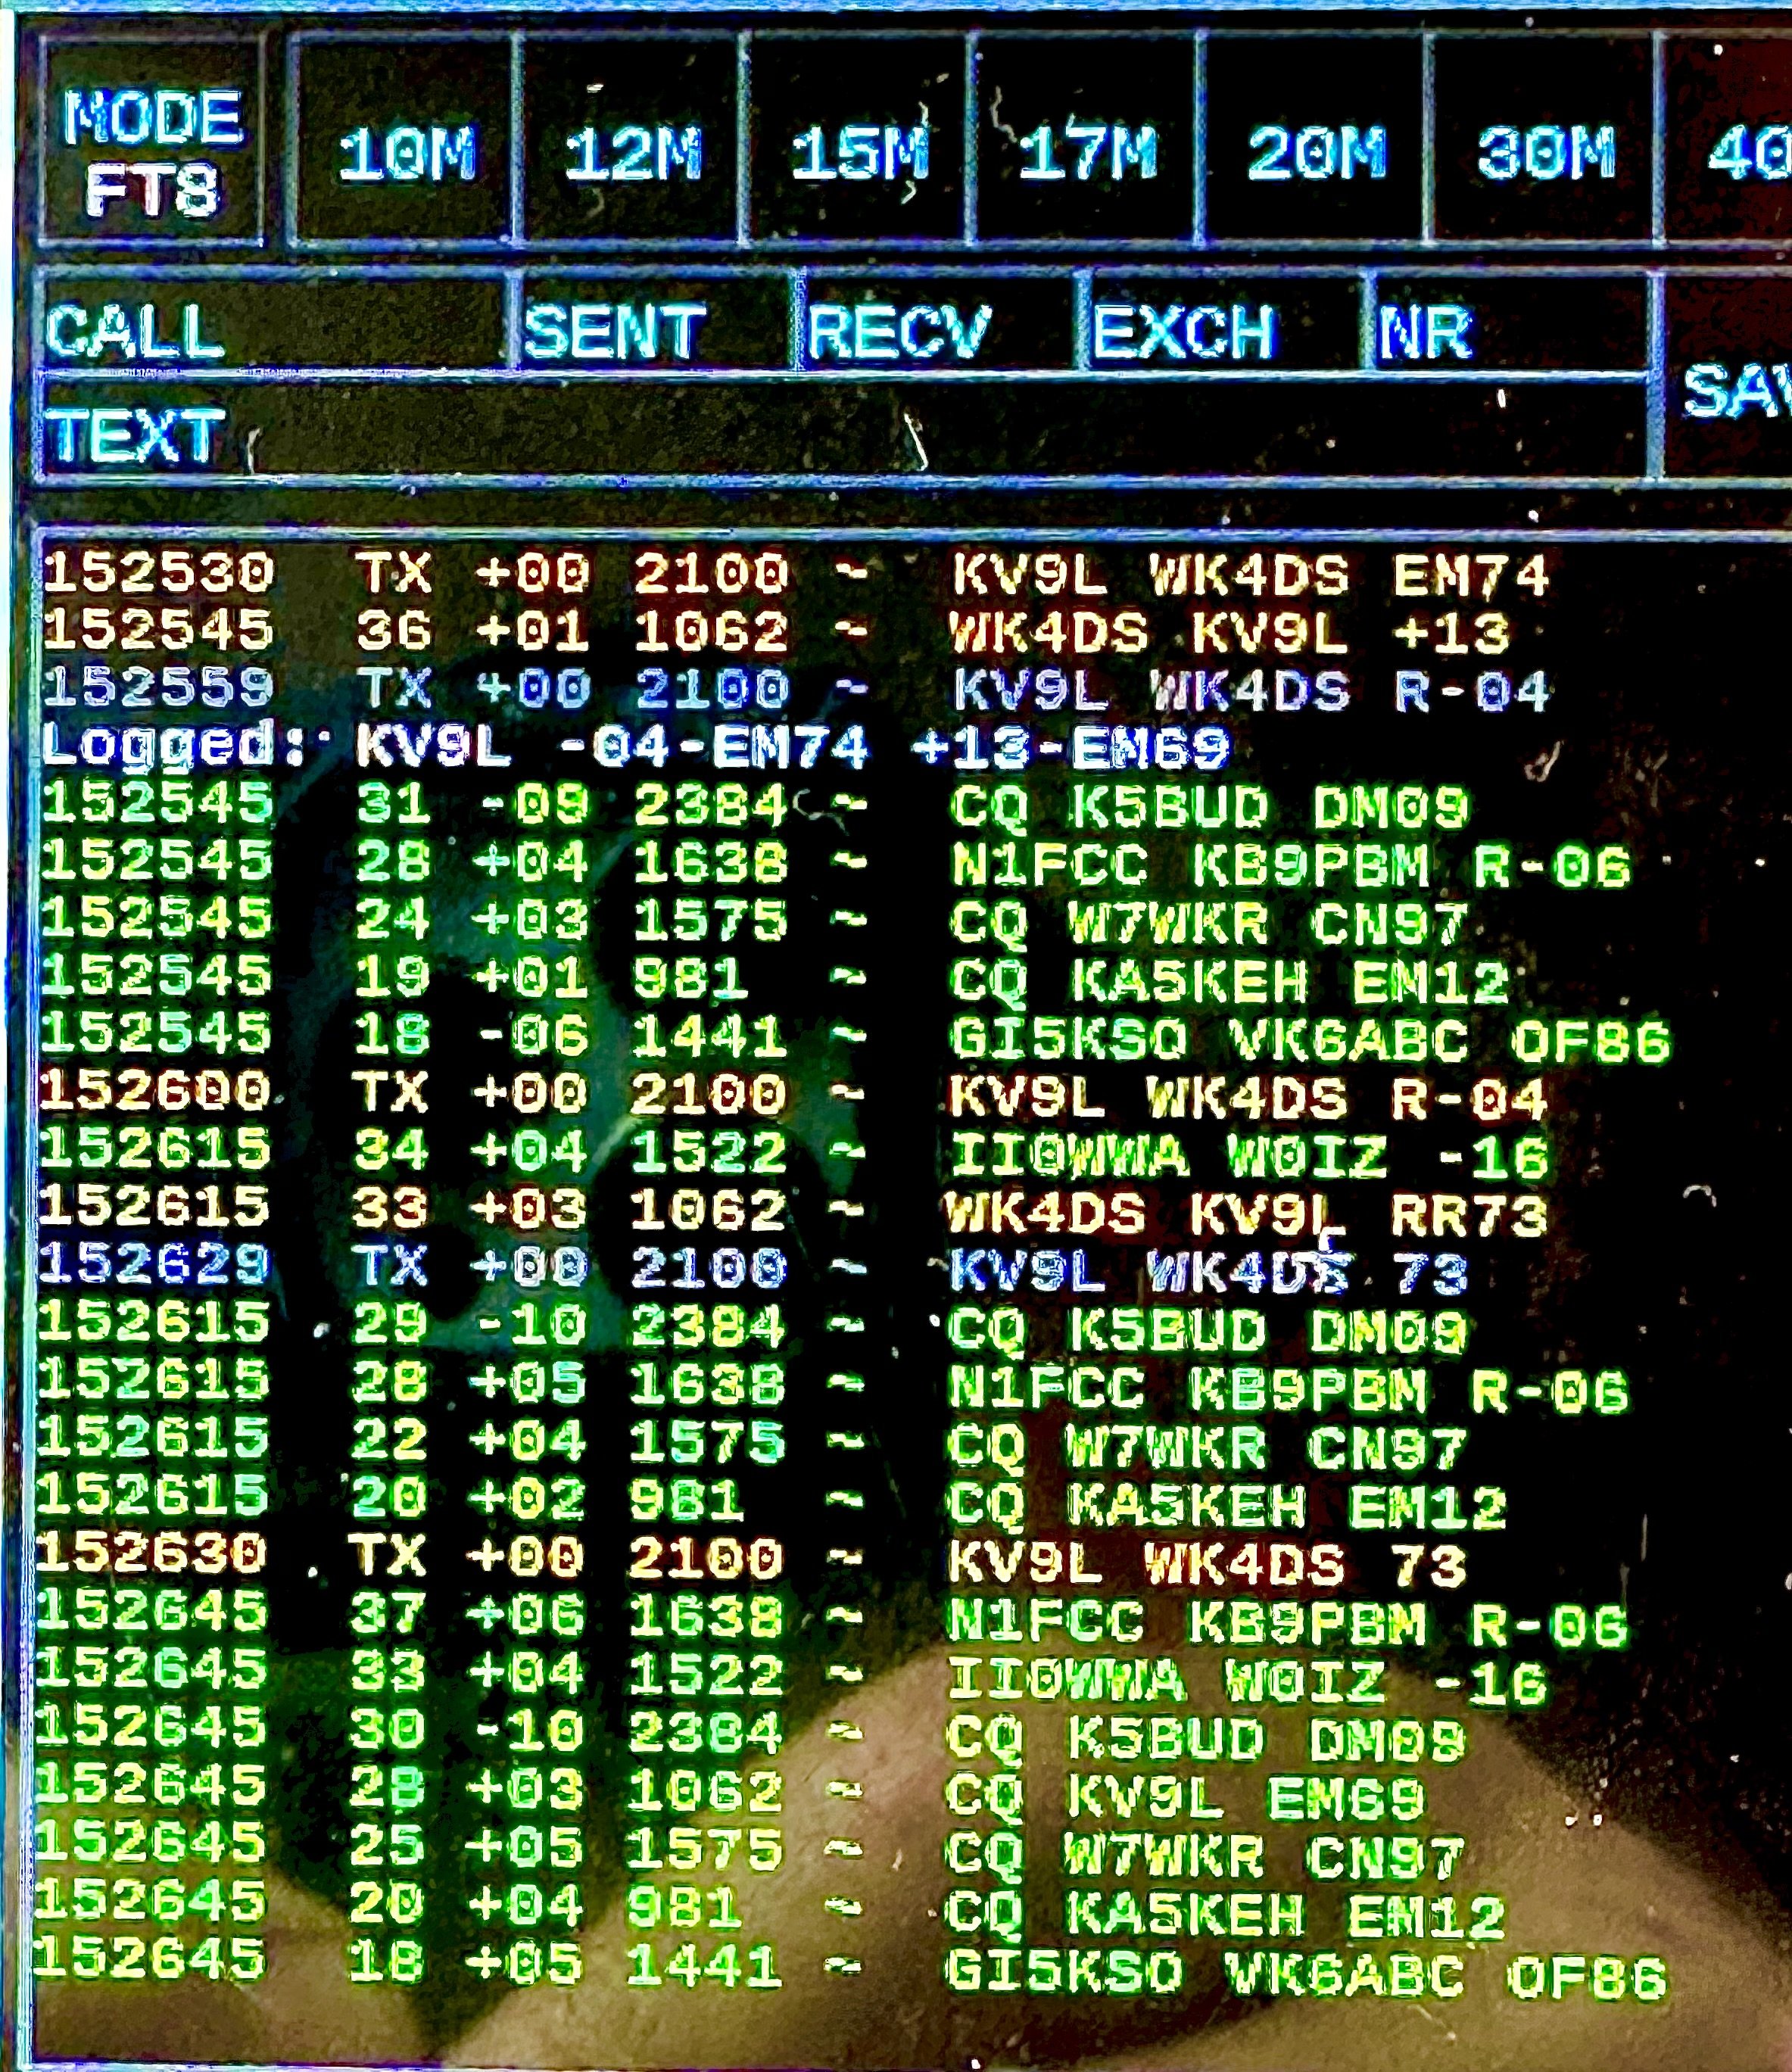
In the above photo I learned something strange about the sBitx today. The two clocks don’t have to be synchronized to work. FT8 is not time forgiving, your radio time marker has to be fairly accurate (within so many milliseconds or maybe a second or two max) or it wont make connection at all with the other stations. As you can see in the lower photo, FT8 worked perfectly and I made several contacts with this mode so the computer clock must not matter at all… I don’t know what is going on here but it works so I dont question it.

Today saw a bunch of DX early on which always makes my day. But all in all it was a great day for POTA and I was stoked to get 21 calls in the log. Until next time, dust off that key or microphone and see if you can get a park or two into the log.

David

Scout…ing for contacts POTA style

Today saw me field a “new-to-me” radio, a Ten Tec Scout 555.

If you have never seen one of these radios, you are not alone. This is a radio that was produced for only about 15 years, towards the end of the company’s life before it changed hands around 10 years ago. It is unique in that it doesn’t contain every band but rather only one at a time. These little modules each contain the special bits to make it work on each band they are designed for and the goal back in the day way to just get the bands that you use. Turned out that these radios quickly formed a cult following and they all wanted the “whole set” of bands for them. I have the whole set of bands thanks to KG4WBI rounding up an 80 meter module and presenting it to me as an early birthday present. Once I had the whole set, I felt this iconic antique needed a better way to travel around when in my truck so I went to Harbor Freight and grabbed an Apache 4800 hard shell case for it. The Ten Tec Scout fits perfectly alongside the set of band modules. I even created a pocket under the radio to store the power cord so I have the whole rig in the case. (The 20 meter module is currently installed in the radio in the below photo)

Today saw me back in the “truck-shack” (I think this is what I am going to start calling this in the future) and setting the radio up on the hard shell case in the passenger seat. Today’s setup was not for power access though as my internal power cord it only fused to 10 amps and the Scout draws that much on transmit normally since it is not user adjustable on the front panel…yet.

I have found a website about the Scout that is a literal treasure trove of information about this radio, mainly in the CW mode, but a wealth of information none the less. I found the website by watching Coastal Waves and Wires video here. The website is by NA5N and is linked here for quick access… His mods for the Scout are pretty extensive an he does a great job of documenting the mods as well as explaining the process the radio uses to transmit and receive and he even has these hand drawn graphics that are amazing.

Back to the activation after chasing a rabbit for a minute…

So today I started on 40 meters as I figured I could make a good many contacts there on SSB, problem is that I have tuned my ham sticks for the CW portion of the band and the 40 meter ham stick is not very broad banded so it really wasn’t going to allow this. What did I do then? Well, I got on CW and made a few contacts before moving up to 20 meters where the antenna is broad banded enough to cover the entire amateur band space.

A couple of noteworthy items here. The 36Ah battery weighs almost nothing but packs a ton of energy. I use it from time to time to power my POTA ops but most of the time it is backup power in my shack for use during power outages and emergency nets and such.

The key I am using today is the Gemini and is a great little collapsible travel key. I had one little problem with it right after buying it due to the center post working loose but other than that it has been flawless. Great portable CW key if your wondering.

The antenna setup is as follows, hamstick riser, hamstick in QD socket, then several radials to form a counterpoise. I have taken to running one or two LONG radial now to play with how they interact with the hamstick antennas and so far it has been interesting to say the least.I found that on 40 meters, if the long radials were pulled taught, (I “anchor” them with a simple weight so I dont need tent stakes) that the resonant point would be well under 7.000mhz, but if I pulled just enough slack in them that they laid on the ground all the way except the first 8 feet from the antenna. Imagine gently curving down to the ground about 7’ from the yellow antenna riser then laying on the grass the rest of the way out. This moved the resonant center value up into the CW portion of the 40 meter band.

The point here is that the length and position of your radial field is absoloutly critical to your antenna system as a whole. The more I play with these radials, the more I learn about how they interact with the system and how important it is to measure your antenna prior to starting your activation if you build it on site.

In the photo below you can see how the radials were setup for the 20 meter band.

Remember at the beginning of this story where I mentioned “ominous” clouds? Well, here is a photo of them to show you what I meant. That looks like rain to me, I did get by without getting rained on before finishing, but that looks EXACTLY like the kind of clouds that bring rain to my area of operation.

Some thoughts on the logbook from today. I have gotten very comfortable with paper logging in the field and then transcribing at home. I did it today actually and it was fine…for the most part. But there was a couple of times when I needed a helper to log for me when I was working SSB. SSB happens so much faster than CW does for me that I was struggling to keep up with the log.

If you will notice in my other posts, I will number the QSOs and even write out the time on the FT8 QSOs as they are pretty slow to complete for me. But once I moved to 20 meters today and jumped on the air with more than 17 watts, things got sporty! I literally stopped writing line numbers, abbreviated most of the time stamps and even left out some of the states just to keep up! It was madness! I could not believe how much more your signal gets out with that minimal amount of power increase. It was a blessing and a curse at the same time, I now see why people will computer log in the field and have a helper to log for them so they can keep up. I could have easily worked 100 QSOs without trying hard if I had just stayed longer at the park. The SSB portion was on fire! The CW portion was doing fine too, but there were SO many more ops on SSB on this day…so many more… In the end, I had a great time and even worked my buddy Roger KG4WBI, this has to be my closest 20 meter contact for POTA ever. If I measured it right we were 2.9 miles apart. LOL What a great day to be on the air!

73

WK4DS

SBitx V3 Radio goes to the park

Here we are again, my old friend the sBitx V2 (V3 now but more on that later) and a hamstick with about an hour to get an activation. Plot twist, the bands are terrible as there is a solar storm or something as you can see from the space weather report I captured from the time of the activation.

Just from looking at the above report, you would think that it would be anything but fun to activate a park… and you would be wrong as these reports, while handy for chasing rare dx in distant lands, mean very little for the POTA op, at least that is how it has been for me as a ham in the southeast United States. I have heard that in other places like out west, it is tougher as the density of operators is much lower, but if you live in the South, it seems that getting an activation in 2024 is pretty easy.

Today also saw me back inside the truck due to impending inclement weather conditions as you can see in the photo above. I wound up taping up the antenna connector to reduce water entry and was fortunate in that it didn’t actually rain so all was well anyway. It worked out anyway as I had not charged the battery from my previous outings so I wasn’t sure of the level of charge and this radio demands more energy than my other QRP rigs anyway.

Today also saw the use of the “ratty radials” as I think I am going to start calling them. As they seem to work SO well like this for some reason… haha. I did only deploy the 20 meter radials this time as I was in a hurry and didn’t want to mess with bands that didn’t “produce fruit” readily like 20 meters does. It seems that the bulk of the CW ops are almost always on 20 meters. I have also noticed that the FT8 activity is also much higher on 20 meters as well so that was also a perk for me.

I really like how the sBitx gives me the flexibility to use FT8 native in the radio and with the “push” of a touchscreen button, I can switch to CW and work that mode as well. It also allows me to use a regular mouse (if I remember to bring it) as well as just using the touch screen. Lol

As mentioned earlier my V2 has been modded to the V3 specs by changing the transmitter finals and updating the support circuits to bias them properly. The changes are pretty simple and it works great. I have mine biased just a little on the hot side and currently I am getting 50 watts of 80 meters(it actually produces more but I don’t want to push my luck here with over heating the transistors so I back the drive off to 50 watts as seen from my shack wattmeter in the photo above…) and 30 watts on 40 meters which is incredible for such a small radio. It has lower outputs the higher you go in the band due to the circuits being optimized for the lower bands, but it is still enough energy to make contacts with ease.

I also wanted to make sure that FT8 wasn’t going to cook the IRF520s like it did the old transistors so I setup in the shack and proceeded to work FT8 at this power level for many hours and on several days all with perfect operation so I am confident to take it to the field.

Today saw my SWR running about 1.5 : 1 so the radio was outputting about 15 watts on the display (this is actually about 13 or 14 as the meter on the radio needs recalibrating since the update). If the SWR is lower it will run as much as 22 watts on 20 meters under the current conditions.

I got on FT8 while I started getting all my paperwork ready and such, this is a benefit to me of FT8 in that I can be working QSOs while I am also doing administrative tasks at the same time. It basically allows me more air time instead of having to do the admin stuff then go live with the activation. Well FT8 was going so good that I just kept going with it! The QSO rate on this mode is a little slower for me as I am not really proficient with the mode like others are, but I can pretty consistently make a QSO every two minutes or so and this is fine for me as I am not one who wants tons of contacts anyway.

Also, check out the cool DX station from Mexico as well as the special event station I was able to work once I switched over to CW! it is always fun to work stations like these two awesome contacts above and beyond all the cool cats I worked otherwise as well! With less than 20 calls in the log, this is still one of my more favorite activations. Terrible band conditions due to a solar storm, worked two different modes and made a bunch of contacts…what more could you ask for?

Thanks for following along on my antics and I hope you come back next time.

WK4DS

Tire station…

Today saw me wanting to go activate a park as the weather was wonderful and I had a little time to go so I headed over to my usual location at US-2169 (Cloudland Canyon State Park) and went to the frisbee golf course parking lot. But then as you see in the sign below, it says Ascalon Trailhead… Well, read on to see why.

Meet N4ARV (Anthony) who was setup with his FX-4CR portable station. He had already strung a nice long wire up into a nearby tree to work some POTA SSB in my usual spot! We chatted for a few minutes and we agreed that since I also wanted to work 20 meters (he was already on 20 at this point) that I would head over to the Ascalon Road Trailhead to prevent our radios from overloading each others receivers. I could have probably just went down to the canyon rim lot, but I knew Ascalon would be quieter so I hopped in the truck and was on my way.

Anthony had a really tidy little kit that he was operating out of today, the battery was really small too. It was right up my alley… haha. Just what I need, another radio…The FX-4CR is a powerhouse of a machine too. It is loaded with features that would make a full size radio blush! He was working SSB and it looked like he was not struggling at all either. Hope to meet him again at some point.

Once you get to the Ascalon Road trailhead, you are greeted with a little reminder to pay for your parking. I am exempt from all this mess though as I buy the annual pass, which for a POTA op, is worth it’s weight in gold since you will be in parks all the time.

I think I have activated 42 or 44 Georgia parks so far on this pass. If I had used the kiosk each time that would have been over 200 dollars in parking fees. Instead I have my annual pass which is only 50$ and my renewal isn’t till July. Last year I got over 100 activations on that pass making average parking costs only 50 cents per visit…not bad for what you get access to.

As you can see below, I pretty much had the place to myself. There were a few people that are behind my truck and are out of camera frame, but midday on a weekday is when I like to activate as you get the run of the place for the most part. I found a shady spot and parked there so I could setup on the bedcover, but as it turns out, the truck was on a slope that made the shady side about 5 feet off the ground. I knew at this point that I had to get creative with the radio location. I have setup like this once before already and I think it was with the same radio too, but today I setup with the whole little mini-station and it still fit!

Meet the “Tire Station” location of my POTA setups. I only have about 4 locations that I use. The truck cab, the bed cover, a random picnic table (basically I will use any available picnic table) and the “tire” station. I don’t think I have setup anywhere else in over a year other than these four positions. It works well with a folding camp chair, which I keep in the truck. It is also at the perfect height for my CW listening operations so I don’t need headphones as long as the rest of the area is still quiet.

Today also saw the introduction of a new piece of kit for me. The aviator knee clipboard… This widget is the perfect tool to hold my notebook and I could even stand up and get stuff out the pack or what ever and it would stay put. That was awesome to say the least, and is a great addition if you paper log like me. I don’t know how I got by so long with out it now that I have it.

As you can see, the clipboard make a little table of sorts that I can sit my stuff on and still work with the radio and such. I highly recommend this device for POTA ops. I got mine for Christmas, but if I had to guess, it probably came from Amazon… Just don’t forget that this “table” is attached to your leg and if you stand up, all the stuff on the table will go for flying lessons immediately.

I have memorized what the four knobs control, this frees me from having to look at them to control what they do. First knob is keyer speed, I use it to slow down for slower ops mostly, but I usually set it by ear anyway so I dont have to see it. Second knob is RF Power and it is set and forget, I dont change it during the activation at all. Thrid knob is RF gain and I use it to control the noise floor, I will usually turn it down a little to lower the band noise, but will turn it up to work a weak station. The last one is AF Gain (AKA Volume) and I use it a good bit, mainly when I get a really strong station coming in, I will back it down a little then, and then bring it back afterwards. But I use three of the four enough to memorize what they do so I don’t have to look at them. That is a huge benefit to such a simple radio, you simply memorize what each button, switch and knob do and you can operate the radio in the dark. I could run this radio blindfolded. I don’t think it will transmit out of band so I am pretty sure I could literally operate it blindfolded…only problem with that is then I couldn’t log…lol.

Another little addition to the radio that I really like is the S meter I built for it. I am thinking about changing the way it connects currently though as it needs the 3.5mm socket on the same side as the 4 pin plug. This would help tremendously with the arrangement of the little station at times and I really need to do it soon…lol. I also need to rework the power cable on the power box/speaker unit to be a little longer too, I dont know why I made that cable only 6 inches long.

Today saw a great run on 20 meters in the time I had allotted for the activation. As you can see below, I made 29 contacts in about 45 minutes at QRP power. Not bad for me. I enjoy the challenge of using small radios at these parks to make contacts like this. I will occasionally use larger radios too, but this is my jam…

I hope you enjoyed coming along for an activation with me and hope that I will work you on the air at some point.

40 meters QRP is FUN!

Today saw the introduction of my newly acquired 40 meter QRP CW radio that I picked up at the Orlando Hamcation. Read on to see what I think of this radio and how the activation went.

A quick over view of the radio. The transceiver is built by a silent key (W9SR) and I purchased it from the estate. The first thing you will notice is that it has no obvious numerical display except the ten turn potentiometer in the center. This is in fact the VFO or most likely the VCO if I had to guess. I am guessing as I have not dismantled the radio and really dont want to risk breaking it since it is a working machine currently. I can guess this though as it is a resistor and a resistor will allow you to vary the voltage easily on a varactor diode creating a Voltage Controlled Oscillator.

The next thing you will notice about it is that it doesn’t have any labels for the controls. At first I was worried about this, but then the fellow who sold me the radio showed me that there was a legend card included with the radio which has two critical pieces of information on it. The first is the chart that shares the value correlation of the potentiometer with the frequency of the radio output. The next thing it shows is what all the knobs and switches are used for on this little radio.

I decided to use this radio as I had a chance to activate a park earlier than usual today so I grabbed it and headed over to US-2169 (no longer K-2169 since the POTA people had to update all the parks due to the increase in activity and such with the program.) Heading over to the park I also took the Argonaut 5 kit as it has some keying gear in it I wanted to use. This turned out to be a good call as I could not get the SWR to pull down on the antenna today and I ended up adding the tuner that is also in this kit. This allowed me to add some inductance and get the antenna system to a nominal 50 ohm impedance match to the transceiver output as well as pull it to the center of the smith chart for an almost purely resistive load as well. The nanoVNA is invaluable for seeing things like this and it is why I like having it in the field.

Once at the park, I went to my usual spot at the frisbee golf course parking lot and proceeded to set up the system.

As you can see from the photo, it was really crowded today and I had trouble getting around all the people to setup my antenna system… lol. Only one park ranger and one truck passed through the lot during my whole activation, I was a little surprised by this as the weather was nice and there was a bunch of people down at the canyon, so I figured there would be a bunch playing frisbee golf too, but there wasn’t.

I have had trouble with my 40 meter hamstick the whole time I have owned it. This problem comes in the form of high SWR and I can only surmise it to be because there is not enough counter poise. I put out what I though to be enough radials and checked it and found the SWR to be 2.5:1 which is outside my personal limit of 2:1 so I added another radial from my kit that is usually for another band and checked it and it was a little better, but not great…maybe 2.1:1 or something like that.

So then I thought I would do something out of the ordinary and took my 17 meter radial set (it is one wire but it has a tap in the center with a STA-KON connector to attach it to my antenna mount). This in itself is not unusual, but the way I deployed it was. I figured I would make a single LONG radial out of it instead and see what would happen. Wouldn’t you know it, it helped ALOT!

You are seeing that right, it has a clove hitch tying it to the tree branch. Maybe that helped a little, I don’t know at this point. But I decided at this point to do some experimenting where I remembered in the past something about curtain dipoles and how you could drop a line down from the horizontal and it would change the antenna. I had some little gator clip leads in my nanoVNA kit so I grabbed one of these and clipped it to the STA-KON in the middle of the line and it made a difference too! Nothing extraordinary, but it did help so I left it. Checking the nanoVNA on the smith chart showed I had a good 50 ohm impedance to the antenna but the system was capacitive so I added the tuner so I could balance this out and get a clean load presented to the radio as I don’t want to burn this little guy up on the first outing. I ended up with a total of 5 radials put out to get the antenna and radio happy today and it looked ODD to say the least. I normally will run one or two at the most, so this looked like a spider web… lol.

I had intended to setup on the bed cover today as the weather rwas pretty nice to start with, but by the time I got to the park the wind had picked up to the point it was out of the question to try to hear CW with the radio fighting wind noise too. Because of this I setup inside the truck again and this made it easier too as I could just plug into the truck and go. So the station look like what you see below today. The N3ZN key and the Hamgadgets keyer into the W9SR 40 meter monoband CW transceiver and out of it into my little MFJ antenna tuner I keep with my Ten Tec Argonaut 5 transceiver kit.

Now, something about this little radio that is cool and most new comers to the CW corner of ham radio wont know about. This radio has relay keying. And the relay is kinda loud. It is almost comical with today’s diode switched radios that are silent and FAST. This little radio is far from a full QSK machine, but it works well none the less. I only missed a letter a couple of times and had to get a repeat to confirm it. Not bad for a radio that is probably built in the 1970s if I had to guess.

Another thing I have noticed about me lately is that I am drawn to this kind of radio more than the big box machines. I have owned some impressive radios in my day to include a Kenwood TS-950 SD, Ten Ten Omni 6+, as well as a Ten Tec Omni 7 and anybody who knows CW rigs, will know that these are all stellar CW machines of the highest order. These radios work so well that to work stations becomes almost no challenge at all. I have easily worked a metric ton of ops over the years on these radios and have loved doing it, but in the end, QRP really brings a challenge to the table that these machines cant. I know I could simply turn down the power of the bigger rig and sometimes I do, but these don’t travel well and besides it is just fun to use the tiny little machines.

Here are a few more photos of note about this radio before i I close out the showcase. It came in this ballistic nylon rigid pouch that holds it perfectly. Also I changed the ancient Molex connector over to power poles as I could not find a molex to fit it and it even how a 9 volt socket on the back that I am guessing is for some sort of accessory that is no longer needed… maybe a keyer like the Ten Tec keyers or something like that possibly? Who knows, but it is a great little radio.

As for the activation itself, I never have a bad outing, either it is good or better. Today was a good day. Any day I can make contacts is a good day to me. I made 13 contacts kind late in the day for 40 meters to be honest and to also only be using 3 1/2 watts too also made it a lot more sporty. There was a good bit of band noise today so most signals were weaker than usual, the radio did well though in that I could pick out even the weakest signals and was able to work them. I was impressed to say the least. I will be using this radio more if for no other reason than nostalgia. I love it and if you are into CW, you probably would too.

Thanks for following along today and I hope this blog post inspries you to get out and setup a radio. Until next week, 72 and GUD DX

WK4DS

Broke out the Penntek TR-35 for a change.

When you dont use a radio for a while it is almost like having a new radio…

This radio has quickly became on of my all time favorite radios. This tiny radio has everything you could ask for in a CW machine…EXCEPT for an internal antenna tuner…but I digress. In the past I have had the Elecraft K1 (a couple of times actually) which does have a tuner (both of mine had the tuner) but it was not as intuitive to use. That is why I sold it and got this one instead. It is a better radio in my opinion… Even missing the antenna tuner, I prefer this little radio to the K1, now this comes with some needed caveats as it is not really fair to compare these two radios directly. You see the K1 was design around 20 years ago and the TR-35 my more recently with much more modern technology and features. The stability of the TR-35 is uncanny compared to the K1 which would drift a little till it warmed up. Still the K1 was a wonderful machine for my needs and I used it to activate a POTA park on the island of Hawaii last year, so it is plenty capable.

Due to the weather improving I have moved the “shack” outside and setup on the bed cover to get some sun and fresh air, plus it is easier to work since I can spread out the gear somewhat.

I like these hamstick antennas so much that I am thinking about making a tripod mount for them so that I can setup at a nearby picnic table and use them with an elevated counterpoise concept… I could even get them higher above the grade this way too, possibly improving performance a little.

So this is the whole station today, the hamstick on 17 meters with a 15’ coax to the common mode choke. I put it on the nanoVNA and the resonant point was high, and I think it is from the fact that the 17 meter counterpoise wire have some broken off of them which makes them too short for a tuned circuit. But nonetheless the SWR measurement was plenty good enough to use, so I got on the air in short order. To try to compensate for this, I added the 20 meter radial that works so well for me now in the past on a bunch of bands. (I should probably measure this wire and make a new since it is getting frazzled) but it didn’t help very much today. I left it anyway as it did seem to help a little…

The operating position today… I really like using the bed cover for the operation position as it affords me the most user space I could possible imagine as well as it is simple. I have activated with this battery 3 or 4 times at this point and it is still over 13 volts!

The key for today is the Gemini travel key. This has turned out to be a wonderful little key and I am so happy to have bought it. It works so well.

As you can see from the log, I had a great day on 17 meters and even landed me a DX station! Jan was in the Netherlands when I started hearing his callsign! It was awesome that he could hear me too!!! There was some fading of course, but he could hear me! I made a good bit of notes about the activation in the log today where you can see things happening like when I lost a QSO outright to some one tuning up on top of me…for a long time… There is another note about the time when someone had a messed up car ignition that created some broad band noise and I couldn’t hear anything for a few minutes till they left.

Quickie CW Activation

Let’s goto Cloudland for a break from troubleshooting a radio. I have been working on this Ten Tec 6 meter FM machine for a week or two at this point and finally redrew the oscillator circuit so I could more easily understand the point of all those varactor diodes…

After studying this for a while I decided to get on the air with a different radio and have some fun with CW. I didn’t have a lot of time so I decided to goto the Sittons Gulch parking area of Cloudland Canyon State Park (US-2169) and setup inside the truck. The parking area was packed on a Friday morning and I almost didn’t get to setup here!!! So much so that the only available space was next to the entrance on the shoulder of the road. You can see how close I was to the gate in the photo below.

Here is a special trick I figured out too. The one radial I cut for 20 meters and then subsequently was broken and twisted back together…(making it short for a resonant antenna on something just higher than 20 meters…). This poor radial sees so much use, I really need to make a new radial wire that is this length but without the broken spot. Another thing is that it also works with my 17 meter antenna too. So one radial works on two antennae!!! Sweet!!!

Today saw me using the Penntek TR-35 QRP CW transceiver and none of the extra widgets I have been using. Headphones are needed since it has no speaker of any kind. Another quirk with this radio is that it is wired from the factory for a mono headphone connection (this is user adjustable by dismantling the radio and changing the connector wiring physically) so I need an adapter to be able to hear the audio in both ears. For DC voltage requirements, I simply plugged into the truck power cable I recently installed and I was off to the races!

If you look at the log sheet, you will notice I started 11 minutes before I made my first contact. This is because I setup on 17 meters to start with and called CQ for ten minutes with zero answers. I finally learned my lesson and moved down to 20 meters where all the hams were located. Things immediately improved and I made quite a few contacts once I made the move.

I hope you have enjoyed this little excursion to my local park and seeing what I do when time is tight and also space is limited. Until next time, get out and get on the air.

72

WK4DS - David

WA4MCM SWR/Wattmeter

I recently added a new device to my shack for the QRP section. It is the WA4MCM SWR/Wattmeter and this thing is really cool. A little background about Don is that he started selling these on QRZ.com in the “Ham Made Gear” section and immediately sold out the first batch! I figured when things calmed down a little that I would get one then and it slipped to the back burner from there. Then I found him at Hamcation!

To be fair, this is intended to be a kit that you build and tune yourself. But I found Don at Hamcation and after talking with him for a while figured out that for a small nominal fee, he would build and tune it as well! Below is a photo of his display where he was demonstrating his remote antenna switches as well as his wattmeter.

Opening the box, you are greeted with a note asking if you liked everything (which is a nice touch) and then you have all the goodies!

Then the 3.5mm audio cable is the comm link between the sensor and the meter, then there is a stylus for the touchscreen. Next is the 12v 1amp power supply so you can power it from wall power if you want. I made up a simple power cable to plug into my powerpole strip that is fused and fed from a Ten Tec 20amp powersupply instead so I can power down the whole shack with one switch.

Next is the sensor, which is rated for full legal limit power, but is sensitive enough to go down to .1watt increments should you need it. Finally is the meter itself. It has a power switch on the back as well as the 12vdc port and the sensor port.

He has written an extensive owners manual that covers usage as well as calibration. It is not printed though, so if you want a hard copy like I want, you will need to print it out yourself.

The unit has two power ranges to choose from 20, 200, 2000 and 10, 100, 1000. To switch between these requires you to retune the meter so it is a thing you do not take lightly. I plan to retune to the lower settings at some point as this is going to stay under 1000 watts (my amplifier is only 400 watts anyway). But for now I am using it as the 20 watt version. I currently have it connected to my QRP station as I mentioned earlier and it works fine in this role.

This meter has several features I love such as multiple display options like an analog needle style display as well as the bar graph above and a simple large number numeric display if you are having trouble seeing smaller numbers. It also being a touch screen has a “sleep” mode where the display turns off after a preset amount of time you choose in the settings menu. To wake it up, simply touch the screen and it is back online. It is a great tool and I wished I had bought one sooner to be honest about it.

73

WK4DS

My hamfest "radio" adventure

Roger (KG4WBI) and I have basically been going to the Dalton GA hamfest for 2 decades at this point and this year was incredible as far as attendance and the sheer volume of dealers in the “boneyard”.

So as per our usual modus operandi, we decide to see how many Ten Tec radios are available and this trip we also have some other items we are in search of as well.

I personally was looking for the following:

  • A high power dummy load

  • A low pass filter

  • A ten meter radio that has the CW mode

  • A oscilloscope that works up to 150mhz

Of all these items, I found the first three! Score!!!

This blog post covers my ten meter “radio” part of the adventure.I found a President HR2600 10 meter radio for sale that worked perfectly and bought it for really reasonable money. The below photo is of the finished project.

The first thing I need to do is turn down the output power to 1 watt or maybe 2 as this radio is going to be a 10 meter beacon on 28.221mhz. So I search online and find out the control to adjust the output power in CW for this radio and then I open the radio to make the adjustment…

Once open, I am greeted with a cooked lowpass filter on the output. Seems one of the capacitors failed, caught fire and in the process, scorched the circuit board as well as burning the enamel off of two inductors… now what to do?

Simple, rebuild the filter section.

Another rudimentary search on google turned up a schematic of this radio. The three parts shown are what needed replacing in the filter but since the board what charred, I opted to build a separate filter module on perf-board and wire it down to the edges where the old parts connected. This way I could cut out all the carbon so it wouldn’t leak current.

It literally burned a hole in the circuit board! The above photo shows how bad it was once I had pulled all the components from the board in the area of the damage. That carbon is a problem too as carbon is conductive so if you dont remove the carbon or remove enough parts that it isnt in play then it will cause lots of problems. In the below photo you can see where I cut out the burnt board so it would not conduct. The ground trace broke due to this damage so I simply added a jumper wire across this area to tie it back together. I only did this in case there was a need for ampacity since the ground plane went all around this part of the board. This actually worked so now to get a working lowpass filter.

In the above photo I have marked all the spots where connections are required for the various detectors to work properly as well as the input and the output to the filter section. I ended up not connecting the detectors though since it is not receiving at all and is only transmitting a beacon signal on CW. I checked and it worked fine without these two connections so I simply left them out. Someone will find this radio in the future and think they have scored a treasure until half the detectors don’t function for some reason…lol.

Below shows a coil that had the enamel burned off of it that was sitting next to the capacitor…This part of the radio was technically functioning too (well, passing the RF at the least), since this part was simply a low pass filter after the final transistor, when it burned it simply shorted through and just kept transmitting, albeit without the filtering it was supposed to have, but it was functioning…

Once I had decided to replace the filter, I started simply remaking the bad parts from scratch and using existing parts that were good, trying to emulate the original design. This is where I ran into a problem. In my desire to simply repair it like I did, I ended up creating a lower frequency null that was completely shutting out the 10 meter band… It was a wide enough null that I couldn’t bend the coils and fix it either… (With coils this small, you can shift the null around a little by spreading the coils out on the inductors, but this was not enough to get it to work for me.) So I simply opted for what I should have done to start with, make a filter from scratch and tune it out of the radio with the nanoVNA before installing it…

Above is my attempt at replicating the old parts, I measured the core diameter and it was real close to 1/4” so I simply made new coils based on this and hoped for the best. (The lighter colored inductor on the left is original from the radio, I reused it since it wasn’t damaged.) To test my theory, I simply soldered a wire across the the input and output terminals of where the filter would go (see below photo), powered the unit on and it worked fine (the transmitter was still working as it should). This is what told me the tune on the filter was off frequency. When I put the nanoVNA on the filter it had a DEEEEEEP null right at 28mhz all the way down to 24mhz and up to 33mhz! Seems my replacement parts and their new configuration had lowered the low end of the filter to the point that I was choking off my own signal. Haha…

So here is the filter I scratch built. Side note here, the capacitors in my filter are all high voltage capacitors as the output voltage of the RF signal can be very high at times. It can easily exceed 100volts in some circumstances so I chose capacitors that were at a minimum of 500 volt rated and some are even more. Better safe than sorry in this regard. It has larger inductors which give me more room to adjust them. I used an online calculator to figure the beginning values. This worked great because I had a good starting point to work from. I then connected it to my nanoVNA and checked the loss on the S21 input to see the filters shape. Air core inductors are a funny thing, they generate a nonlinear pattern of suppression that has deep nulls and at some points almost no effect on signal. The photo above shows where I adjusted one coil a little to get the null to land on the 6 meter band and also this is where this 2nd order harmonic would also appear, if there was one (knowing the quality of the factory low pass filter, it probably has a harmonic…lol). This would suppress any harmonics that might show up and also it has decent suppression across the region as well. You can see in the photo below that I added some capacitors to the bottom as well to help with the cutoff and to improve performance of the filter overall.

I ran it through the nanoVNA to tune it so it would let me run the beacon. It was losing about 3.5dB of signal at 28.221mhz but that isn’t a problem for me since I only want 1 watt forward power anyway. I simply connected the radio to a dummy load through a good wattmeter and tuned the pot inside the radio till I had 1 watt on the wattmeter. That 2nd deep null is at the first harmonic which is the 6meter band so it is working like it should. The original filter worked about as good as this one from what the math says. Air core inductors are not great compared to toroidal inductors but they do work. The first null appeared when I added one of the capacitors on the bottom, I will take what ever I can get and this added some suppression to the filter so I left it. The calculator showed the starting point of my filter with the image below captured from the online calculator. The calculator I used took the size of the coil and the number of turns and the over all length into account to come up with these numbers.

I ended up changing the first cap to 33pF by adding another 100pF in series with the other two and I also added a 33pF across the center coil (as this was what was on the original coil and the VNA showed an improvement in filtering when I soldered it on so I left it), I am pretty sure this is where the second null showed up at and also generally improved the whole filter.

So all in all, this was actually a fun little project and I learned alot about filter construction and tuning at the same time. I have said it before and I will say it again, if you don’t have a nanoVNA, get one for this sort of stuff. It works really well and it is super cost effective compared to professional gear that does the same job.

Cypress Creek Preserve K-7389

Cypress Creek Preserve is a new-to-me POTA park and I think that at this point, I have worked more Florida parks than Georgia parks! That is irony at it’s finest right there!

This is a really neat park as it has ponds with lily pads and hiking trails and all sorts of other stuff right from the outset. Most of the other parks I have been to in this area are not quite so enticing when you arrive with it being more of a parking lot and a simple trail into the under brush more than anything else. It took me a minute to confirm that the parking lot was within the park boundary, but I finally did and setup my radio accordingly.

Once I was parked and started to deploy the antenna, I found this little guy supervising the operation to make sure the antenna was in the proper position to be able to work Europe as well as the west coast. I am really grateful too as his efforts came in handy on this activation!

As you can see in the above photo as to why I wasn’t sure where the park boundary was as there was this huge fence between the parking area beside the road and the park itself, but after checking several maps, I was able to figure out that the parking area was in fact in the boundary.

Once again, to see what I could do at mid day on 15 meters, I decided this would be the only band I setup on.. I ran out the one 20 meter radial that seems to help the 15 meter band and used my 25’ coax as well and the SWR showed up at 1.1:1 which is great in my book so I immediately hop on FT8 to see what is happening while I setup the logbook on HAMRS and get my spot on the POTA site.

Well, it was doing great as I worked something like 6 stations before I had time to put the spot up on the POTA site! This is awesome! I was thinking this might be a day where. I work 50 or more contacts from the way it started…

The antenna system at this point is almost a joke to be honest about it. This radial works on several different bands really well and it is broken speaker wire! I have a spot in the wire where it is literally twisted together so that it is the right length and I am afraid to solder it as when I solder this wire, it breaks next to the solder joint. I have done all sorts of things to try to prevent this too, none of which have worked long term. So I have reserved myself to using it till the SWR readings start to show too much of a mismatch and then I will actually work on it. I use this radial on virtually every outing too, that is part of the comedy of it, the broken radial gets the most use…so is life I guess. Since I was backed up to the fence like you see below, I ran the radial over the fence and was able to lay it out in the grass behind the truck properly.

The activation did hit a few lulls, which was handy as it gave me time to catch up the log in HAMRS so that when I finished the activation I was able to email the log to myself so when I get back I can upload it to the POTA website. As you can see in the log below, FT8 produced a half a dozen DX contacts before I landed my first domestic contact! FT8 is a DX paradise to be honest about it. The weak signal capability of that mode is hard to grasp to be honest. I know this as when I switched to CW I heard nothing but Domestic stations for almost the entire time with the exception of two DX stations that were booming in. This is what I am used to doing to be honest, a sprinkling of DX with almost all domestic contacts.

Here is what is odd about FT8 though, when I went back to work some more while I finished up the logbook, I worked almost nothing other than Americans. It really is the luck of the draw it seems, but you could see on the waterfall that the band had some significant fading at this point and some stations would shift almost 20dB in signal from one cycle to the next, that is pretty drastic and makes me wonder if I had got on the air a little earlier if that would have made more of a difference…

Take a look at the CW portion of the activation and you will see a 10 minute period right in the middle where there is no contacts at all. This isn’t me leaving the station for some reason, I was calling CQ the whole time, there just wasn’t any takers. Then Julia (N1XV) answered me and it took another five full minutes to get another contact! This is unreal in my usual activations …albeit those usually happen on 20 meters and that seems to be the watering hole for POTA CW ops for some reason… Back to this activation, then I work Paul (KJ7DT) and then you can tell the band turned back on as I worked several contacts in a row without stopping as I can work about 1 per minute at the speed I like to use (17WPM to 22 WPM).

By the time I had the logbook caught up, I had worked over 35 QSOs so I wanted to see if I could get to 40 before I went QRT at 21:00 UTC as I had to leave about that time. I was able to get to 41 and go QRT wihtout any replys well before I ran out of time so all is good in the world!

What a day! 15 meters gave me a wonderful activation and I got a bunch of DX as well as cool domestic contacts! What more do you want?

73 - WK4DS

Little Manatee River State Park K-1898

I had some time today and wanted to get out of the city here in Tampa so I went to Little Manatee River State Park and setup a quick little activation on 15 meters.

This park is really nice and well cared for. It has many hiking trails as well as a creek on one side that you can canoe in…just dont pet the alligators and you will be fine there, but they do have an equestrian area as well. Plenty to do if you want to do something other than park activations for some reason…lol

Today saw me setup on the bed cover agian as it was nice out and I was mostly in the shade so I knew I wouldnt get too hot. I ran CW only as I didn’t feel like messing with the sBitx V3 to work FT8 as I really only had about 30 minutes of operating time and for me, the FT8 contacts come in a little slower than the CW contacts. I did choose 15 meters though which was a little bit of a gamble, but it worked out once I got on the air and tuned around the band a little and found it was active, I rested a little easier.

I ran the Ten Tec Argonaut 5 transceiver today with the N3ZN key and Hamgadgets memory keyer. This radio is a joy to use for CW and I really enjoy using it for park activations. It has about 20 watts full output, but today I was only running 15 watts as I normally don’t push the old transistors as hard as when they are new… probably don’t matter, but in my mind it makes sense. When I am operating, I use 3 things, well 4 if you count the AF gain (volume). I use the multi-function knob to control the BW (band width of the filter) and the RIT control. The same knob does both jobs, you just hit which ever button you need first then set that function to what you want. The display is currently showing the BW setting of 600 Hz. I will open it up if the band is quiet, but this thing is pretty selective and will allow me to go down to 250 or 300 Hz if I need it and works really well.

Today also saw the use of zero radials. I wanted to see what the SWR would be without anything since these antennae are designed to be used without a counterpoise and just work off the coax shield and car body. I was pleasantly surprised when the nanoVNA showed 1.3 to 1 right out of the chute! Seems my antenna for the band is tuned a little low like this. If I add the 20 meter radials it balances better and move the frequency up closer to where I operate and gets that super deep null right on me.

I did experiment a little with how I laid out the coax to see what it would do and the result was minimal to say anything. I think I changed the reading by .01 SWR from start to finish. Totally not worth the extra effort to optimize the coax… The photo below shows me pointing at the best setup I found and the screen of the VNA showing my target frequency on a 4Mhz slice of spectrum.

I had problems with RF in my keyline. I am guessing due to the proximity of my key and keyer to the antenna. With electronic keying, rf can trigger the keying circuit adding unwanted dots and dashes to your code. I solved this by adding rf chokes to literally everything. If you will notice they are on the key cable as well as the keyer to radio cable and I still have that huge one on the coax as well. I have not added them to the power cables yet but might to see if it will help.

At the end of the day, all POTA is good POTA and I had a wonderful time working a ton of stations. The Ten Tec Argonaut 5 is a great little radio and I count my blessing for being able to land one for reasonable money. If you are a CW guy, then I suggest you try some of the Ten Tec radios as they are simply sublime machines for this mody. I quickly became an addict of their radios and will continue to be for many years to come. Thanks and I hope you get on the air and have some fun soon!

73 - WK4DS

Back in Florida and at a park!!!

Since I am down in Florida for a little while and I am finally going to Hamcation, I thought I would do some POTA as well. Today I had a few hours to spare so I went out to K-1829

This is a new “to me” park so I was a little excited to see what it would be like. When I first looked it up, I noticed it has a check in station at the entrance of the park and a campground and lots of trails. This park is quite large too so it was going to be interesting to see where I could find a spot to setup. With gated entrances and check in stations, these parks usually charge a fee to enter them. Not so here, well sort of… You see, as I was getting near the entrance, I noticed this equestrian parking area and when I checked the map, it was fully within the park boundries. I checked the board for parking rules and there were no rules like payment needed or any specific place or anything like that, so I pulled in here as it was right off the main road.

Once I found a spot under a shade tree, I started thinking about what band to start on. I settled on the highest band I have a hamstick for…15 meters.

This is where I learned something today about the setup that I didn’t know before. The coax is what makes this antenna resonant on 15 meters. Yep ,I put the common mode choke at the base of the antenna and the SWR was 1.4 to 1. Move the choke to the other end of the coax and it was 1.021 to 1! I guess I tuned it with this piece of coax in this position or something as I had deployed the 20 meter radials and then the 30 meter radials to help and wiht just the 20 meter radials, the SWR was 1.65 to 1. This is technically usable, but I prefer it to be a better match to the transmitter output impedance, so I kept experimenting till I figured it out.

Below shows the first radio I used today. The TenTec Argonaut 5 is a wonderful little radio. Since I like CW for my activations, this is a great radio for me. I don’t even have a hand mic in the kit (I should change that to be honest)… Today saw me also as the MFJ 941C antenna tuner as well. I don’t need this tuner with my hamsticks as they are resonant antennas, but I wanted to play around with the SWR meter a little and this also allows me to keep an eye on the antenna system too as I can see the SWR changing in real time this was way. The Argonaut 5 has no built in SWR meter so this fixes that shortcoming for me.

Today also saw the re-emergence of my N3ZN CW key as will. It is a wonderful little key and works like a dream. I run this key through a Ham Gadgets memory keyer for my POTA ops. I store all four memory locations with useful data to streamline my activations. I also have two different cables to connect it to the radio with as well. One goes into the back where the traditional key input goes and the other is a hybrid cable that connects to the mic jack on the front of the radio. You can see it in the above photo with the noise suppression toroid inline. I have been so stuck on the sbitx radio lately that I had forgotten how fun it was to use this little radio.

After I worked a bunch of CW contacts, I moved up to the Ft8 part of the band and changed radios so I could work some FT8 contacts while I wrote out my log in HAMRS. Since FT8 is relatively hands off, I can get my log file for the POTA site done while getting some contacts on FT8 as well. I was able to get 19 digital contacts in the log today like this before I ran out of time. Not too bad for a guy who doesn’t know much about digital modes.

Here is a hint about the sbitx. Don’t forget to update the grid in your settings file before you start or you will be handing out the wrong grid… That one is free. Lol.

The one thing about Florida parks that is very different from back home is the presence of aligators in the water. Back home, it is nothing to goto the river with your friends in the summer and go swimming, but here that is a risky proposition. The park warns of it and I am pretty sure that is what I saw out in the water before I left for the day as well. It is hard to tell in this photo but there is a tiny object right in the middle of frame below that was moving in odd patterns around in the middle of the water, could have been a log, but my mind wants to say it was a gator…lol.

Here is another subject I learned about today you might say. I wanted to see how much difference it would make to move the common mode choke from one end of the coax to the other on my 15 meter hamstick as I am pretty sure I tuned it with the choke at the transceiver end of the line. Well, it made a huge difference to be honest about it.

The ground plane makes a huge difference if you plan to run resonant antennas, just keep that in mind while you are tuning up your system. EVERY device in the line will factor into the system impedance and is important. Dont forget that.

The log today shows of many Canadians as well as a Belgian too! I was really stoked to get them into the log as well as Utah and Idaho, those are all pretty long trips for 15 watts and a hamstick, but they made the trip! I am constantly amazed at what you can do with these little diminutive antennas to be honest about it. Just goes to show that about anything that will tune up (with or without a tuner) will radiate a signal and can make contacts. You hear about people having to load their gutters because of covenants restricting antennas and I dont doubt that they make a ton of contacts with them.

All in all, I see that there was no need to get the other antennas out at all. There was plenty going on up on the 15 meter band so I never bothered to move off the band. It was a great time and I hope to replicate it again soon.

Until then 73,

WK4DS

15 meters was on FIRE TODAY!

I don’t normally chase DX…

But today it wasn’t really an option to do anything else at one point. I had been wanting to use FT8 on the higher bands but had not had much of an opportunity lately. I got a day off and the bands were on fire so I figured it was as good a time as any to setup a POTA operation and see what I could do. As you can see in the above photo, it went splendidly well.

This was the operation position today. The cab of the truck has become a familiar place recently what with the temps being so low. (I really should get the armrest recovered at some point.) The difference was today is that I was just lazy and didn’t want to setup away from the truck. So I used the hamstick antennas and just sat in the truck to operate. It really is a convenient location to setup a POTA activation to be honest. Today also saw the use of my new Christmas present, a small writing table that hangs on the steering wheel. This is handy once you get it setup properly. I was able to log while operating and even was able to do some call sign searches on QRZ.com at the same time.

Above shows another milestone as well, I finally worked my friend KV9L on FT8! He is the person that got me into digital modes to start with and it took me months to finally get on the bands at the same time as him and then find a band that would support our QSO, turned out to be 30 meters today was that band. I worked a bunch of 20 meters FT8 before I moved and tried to find him on 30 meters though, but the antenna I was using has the wrong take off angle to be able to hear him on 20, so that is why we moved to 30. Once on 30 meters, and after our SKED (of sorts) I worked a few more ops there before getting my “chip in the big game” and moving up to 15 meters. Boy did it pay off too! My very first contact on 15 meters was Russia! Then it was DX station after DX station for the next hour, with one lone US operator hopping in as well. I would have to reposition my transmit frequency from time to time due to band crowding and such but the QSOs were steady. People will transmit right on top of you and if you don’t have any power…like me… you move somewhere else. Well with that kind of luck, I figured I would hop on CW and work a ton of CW contacts too…

Didn’t happen like that at all. I worked two ops on 15 meters CW, there just wasn’t anyone on the band and it was fading pretty hard for CW to hold up. I did get one DX station and Paul (KJ7DT) from Idaho so the mileage was still working great, just wasn’t many ops down there at this point. One of the reasons that I think the band held up so well for me today was the nanoVNA. As you can see below, the SWR plot shows that I had the radials positioned perfectly for a broad-banded usage potential on 15 meters, I thought for a minute about hoping on SSB and see what I could do, but really wanted those 20 meter contacts more… lol. With things this good I had to get on FT8 a while and this is where I got all that DX. When the conditions are right, you just get in the groove and have a wonderful time.

As you can see above, I was using the sBitx V3 with the native FT8 software today. It is functional and efficient, but it is the only one I know how to use at this time. Maybe at some point I will get FT4 going too. But for right now I am happy to be making FT8 contacts on this little radio.

Once I got finished tinkering around on 15 meters CW I decided to see what I could do on 20 meters CW. I moved down, which involved an antenna change… This means getting out of the truck, going around back and switching the ham sticks out, then if I have not done it yet for the new band, I have to install the radials. Fortunately the 20 meter radials were already setup so it was just the vertical and back inside the truck to check the antenna prior to putting RF on it and then setup the radio on 14.063mhz and started calling CQ. Well it didn’t take long and the calls started coming in from all over the USA. I had wonderful propagation today to all corners of the Untied States and the logbook reflects this as well. I even worked a VE7 call that was in Arizona! Everywhere from Washington state to Mississippi was there today, it was awesome!

This QSO map says it all, The 15 meter band was a great long distance band on this day. Just look at all those pins in Europe and Russia! If you don’t normally venture far from 20 and 40 meters, I would highly suggest giving the higher bands a shot sometime, you just might be pleasantly surprised at what you find! KV9L said that 10 meters was just as good if not better!

I hope this story inspires you to get on the air and try something new.

73

A 2 park…digital rove on New Years Day???

I wanted to activate two parks today so to add some challenge (for me that is) I decided today I would only use FT8 to get the activations. The bands looked good so I had high hopes.

FT8 was alive and well on 17 meters this morning.

The cool thing about the sBitx V3 (I did the software upgrade but have not changed my finals yet) is that you don’t need anything but the radio itself to do FT8. No keyboard or mouse or anything. So I setup at K-2169 and get started with my deployment and decided to start on 17 meters first to see what was going on as far as activity. To say the band was active would be an understatement. The FT8 portion was buried in activity so I looked around and found a spot to setup to transmit and got started. The first few were Americans and then I started getting DX stations! A lot of them too! I even got the DX-pedition to T32TT in the log! To work them on 17 meters and a hamstick with 20 watts, that is not bad in my book. The signal reports reflect it too lol, just look at the logbook in the photo. I think I netted equal numbers of dx stations compared to domestic stations this time out. That is pretty awesome for someone who rarely sees dx in his POTA log at all!

This is the display of the sBitx V3 running FT8. Everything you need and nothing you don’t. Since it is a touch screen radio, all the buttons are on the screen and if you want to dial something up, just touch the function and then turn the multifunction knob to adjust it. Just don’t forget that the knob is set to that function till you choose a new function or you will think you are about to turn the volume up and instead you will change something else… so to prevent problems, I just select the volume once done to lock the function and prevent accidental changes.

I ran out a pretty good radial field today with four radials, two for 20 meters and two for 17 meters. I simply spread them out behind the truck in the grass and checked the SWR with my nanoVNA (which showed about 1.6:1 SWR

This has become a permanent part of my field kit at this point, I literally check my antenna every time I go to the field now.

I have noticed over time that the SWR has slowly crept up as I have used the equipment. What was once 1.175:1 is now 1.6:1 so before I go out again I am going to do repairs to my antenna system. This is one of the reasons I like checking the system before each activation. Data tracking is an ongoing process. I suggest you get one of these little widgets and just keep it with your portable kit if for no other reason than what I have described here.

The spot, in the above photo, has kinda become my defacto POTA spot on days when I don’t have a lot of time to do radio, but I still want to. It is in a good spot, fairly remote from human activity noise (aside from the occasional frisbee golfer or two) and also has good elevation too. It is quite possibly the perfect location for POTA.

Today also saw the use of the keeper pin I made a while back too. This is for times, like now, where I plan to move between parks and simply remove the hamstick from the mount so things don’t break it off, like errant tree limbs on backroads, and keeps the mount secure for travel. I also didn’t bother to remove the radials either but stuck them in the truck bed to be pulled back out when I got to the other park. I disconnected the coax and just rolled it up in the back seat of the truck since it is so long that it drags the ground.

Once I had gotten setup at K-2169 and was going well, I thought about also running over to K-0716 and getting in an activation there too for the first day of the year. It is about an additional 30 minute drive from Cloudland to Chickamauga but I have a favorite spot there too that doesn’t seem to be a problem with the rangers so I packed up enough to drive and headed over there once I had the activation in the bag.

The main road between Ft Oglethorpe and Lafayette Georgia is Highway 27 and when I was a kid, this highway passed right through the military park, I can remember riding through the park and looking at all the monuments and wondering what they really meant… It meant a lot of people died terrible deaths for ideals… I don’t want to wander down that path here, the point was I have a lot of memories of this place from my childhood and it is interesting to see how it has changed. Now there is a bypass road that circumvents the park entirely, you actually have to take, what is now a side road to go through the park. Kinda surreal to me to be honest about it…

Once at the park and in my favorite spot, I pulled all the radials back out and this time, I put the 20 meter ham stick on the mount. I actually figured the SWR would be better on 20 meters and it was…marginally. Take a look at the chart below though to see how deep the FT8 area was with hams calling each other. It was pretty much saturated with signals. This is a level of saturation that I only see on 20 meters too for some reason, the other bands might be busy, but it is nothing like 20 meters for some reason. After watching it for a while, I finally found a spot to setup for transmit and got to work. What is odd now is that I didn’t get near as many DX stations in the log as I did on 17 meters. There were plenty out there with strong signals, but I only worked one DX station from this activation location and band. Just odd to me how that can happen.

Below is a tidbit I wanted to share with you about how I log. I use the HAMRS logbook app for iPhone, while it is connected to the POTA site it pulls all sorts of data from it apparently. Like the ham’s information if it is stored in the HAMDB database and auto populated the fields if it is there. If not, then that station doesn’t show up on the QSO map as there is no GRID info for them in the log, just remember that if you want the map to work right. I just go to QRZ and copy the grid info for the ham that doesn’t have it in HAMRS and then edit the QSO and add the GRID info and now that call will show up on the map. Another cool thing is that it pulls the RBN data for you if you show up and gives you these little green info graphics letting you know you have been spotted, that is cool as I can leave the log open for adding calls and still get the beacon reports, it will even show the ones manually uploaded by hams on the POTA site too…just to let you know.

In the left side of this photo, you can see the cars on the highway that I was talking about. This little pull off is right off the main road which is super convenient as this road passes right through the heart of the park. You can also see the radials in this photo going out and I don’t have them staked down but rather they are held in place with weights so there is no impact from me being there at all. This gets around the “no driving stakes in the ground” rule that a lot of parks have.

All in all, it was a great day of radio and I was able to complete both activations with plenty of time left over. Set some targets occasionally with your activations to give you something to do other than just make contacts if you want to spice up the whole thing. This was not too awful to pull off…it was actually easily doable without much fuss at all for the most part.

Until next time,

73

WK4DS

Two days- Hamcation and two POTA parks!

Well, it has been two quite long days to be honest and I am tired while I type this up. BUT, it has been incredible to say the least. I have heard about Hamcation for years, but I have never actually been able to attend until now. I will also be honest and say that I was not prepared for what I found, nor did I really expect to find what I found as well.

Of course, I am leading with a photo of me and Tony N3ZN as he makes wonderful Morse code keys, one of which I have and use for my POTA activations routinely. It is always good to catch up with Tony if I have the opportunity. Shameless unsolicited plug – if you are looking for a really high-quality Morse code key, then this is a wonderful place to look, just saying.

Every organization you could imagine was represented at Hamcation. People from the ARRL as well as the Long Island CW club were there, among others such as AMSAT and the local boyscouts troops and so on.

Some notable things that caught my eye were this giant double Tarheel adjustable dipole seen above, as well as the full line up from Flex Radio as seen below. Well, this is the Maestro control head but they had everything they offer up and running so you could play with them. These are some really nice machines to be honest about it. The display is also a touch screen so that is why there really isnt a need for a ton of panel mounted buttons. I do like having buttons, but this is me hanging onto legacy machines that the bigger the radio the more features you could cram onto the front of the radio had back in the golden era allowing for easier access to the functions. The Elecraft K4 shown below is the perfect blend of touch screen controls and panel mounted buttons in my opinion.

Now for something that me and Trey started back a couple of years ago. We would search out all the Ten Tec radios to see what all was out there for sale just to see. Well, below are all the Ten Tec radios that I saw in the bone yard. Some are actually marked as parts machines. This is new for me as normally they are marked as working perfectly (whether they are or not LOL). There was one amp that was marked as a project, probably due to failed tubes that are no longer available and would need a fairly extensive modification to use different tubes. It would be worth it though as the filtering in Ten Tec gear is superb.

Anyway I was surprised that this was everything as there were ALOT of vendors setup in the bone yard. Pickings was a little thin for the brand. To be honest, the main brand I saw on the used gear tables was ICOM and then Kenwood right behind ICOM with a few Yaesu and one Elecraft K3 that I remember…

Below is the new Elecraft KH1 pocket HF transceiver. This radio is going to do two things really well. SOTA and travel radio will be revolutionized by this machine. The fact that is is so small that it is basically the size of a modern smartphone and can talk around the globe, has a built in key, battery, antenna tuner, antenna, logbook AND pen is insane! I really like the concept alot.

I did buy a radio though it was not a Ten Tec. I bought the 40 meter QRP radio shown below that was built by the late W9SR(SK). It is a 40 meter monobander and is really old. Once I get home, I will update the cable with powerpoles as I couldn’t find a molex to fit it at the whole show and then I will test it some into a dummy load to get the power and make sure the frequency is still right and then it will goto a park! His brother was selling some items and this was in that lot. I am glad to know some of the history on it and hope it works right so I dont have to spend a lot of time figuring out how it works internally. Lol.

Speaking of POTA… this is how I did Hamcation this year. Teresa and I are actually staying in Tampa for these two weeks so I drove up each day for the show. Arrived about 8 and since I am “media”, could check in and get photos and talk to vendors a little about things prior to the show opening. This is how I got most of my photos of the booths. Then right around noon or so, I would leave and head back towards Tampa and along the way, stop at a POTA site and get in an activation.

The first one I got plenty of photos and was in the shade the whole time and was outside, the second was none of that. HAHA

I love operating from the bed cover of the truck with the N3ZN key and my Ten Tec Argonaut 5 radio with my Hamgadgets Memory Keyer. This whole rig just works so well and is so fun to use.

This is the first park and was a lot of fun. I setup on 20 meters as I wasn’t sure about band conditions and such and didnt want to take too long, but as you can see in the log, that never was a problem. The little Ten Tec Argonaut 5 works like a dream, I easily secured the activation in 30 minutes and was still back home before 6PM.

The next day I did the same thing with my schedule but with a park that was closer to the Interstate exit so I had longer to operate. I only got one photo of this park and it was of these giant birds walking around in the parking area while I worked FT8. These birds are LOUD when they “sing” if you can call it that. They were maybe 15 feet from the truck when they would make the call. Did I mention that it was loud? Good grief that startled me when they did it the first time!

Since there was no shade at this location, I faced the truck away from the sun, rolled down all the windows and setup in the cab where I was out of the sun. I ran the sBitx radio today since I wanted to work some FT8 as well as CW. This worked great as I had the activation in the bag in no time but wanted to work some additional contacts for a while so I went back to FT8 and made several contacts there while I transcribed my log into HAMRS so I can put it on the POTA site.

Notice on the map just how close the pin is to the interstate in the above image. That was a really nice perk to this park, it was easy to get to and not far off my course heading back to Tampa.

The above photo is a dramatization. Lol. This photo is from a different day but it looked EXACTLY like this duri g this activation as well, I just forgot to get a photo since I was in a hurry.

I hopped on 15 meters at this park, being curious as to how it would work and boy did it! FT8 ran really strong and then CW came in for many great contacts and then I worked 8 more FT8 contacts before shutting down the station and heading home. 41 contacts total with several into Europe on FT8 which is awesome! With my time running out, I packed up the radio and headed back to Tampa for supper with Teresa. This was a great weekend for me as I was able to goto the Hamcation in Orlando AND activate two POTA parks as well! How much better can it get???

I hope you enjoyed this little AAR about my weekend at Hamcation. 73

WK4DS

How well does 17 meters work?

I see a lot of people on 20 meters, but what about 17 meters? I take the sBitx v3 to Cloudland Canyon State Park (K-2169) for a little fun on 17 meters today…

sBitx V3 running FT8 natively on 17 meters.

The WARC (World Amateur Radio Conference) bands are nestled between the typical bands and everyone knows what they are because it is on the license tests. The ones I am referring to, in case you forgot for some reason, are 30 meters, 17 meters and 12 meters.

What the license test doesn’t teach though is that each band has unique characteristics that make it fun to use…at least that is how I see it. Since each of these WARC bands are stuffed between other typical ham bands, they seem to take on the characteristics of the two bands they sit between. Take 30 meters for instance, it will act like 40 meters with NVIS propagation on my hamstick to work hams just a couple hundred miles away and then I will work the west coast on the very next contact as if it were also a 20 meter contact.

Well, the higher the bands get the further they tend to reach more distant stations for me. I don’t have giant towers that have huge Yagi antennas on them for say 40 meters so my results are more of the typical ham who might have a dipole that is technically too low to the ground for textbook operation or a vertical with a couple of radials…you get the idea.

The 17 meter band has the same characteristics as 20 meters as well as 15 meters a lot of the time. For me the higher the band, the better the DX usually. I guess it has to do with the fact that the higher the frequency, the smaller the antenna and with a smaller antenna, the lower it can be to the ground and still have proper performance. Armed with this VERY basic knowledge of antenna theory, I usually expect some cool European stations on 15, 12 and 10 with the occasional DX on 17 meters, but today the sky was alive! Well, it would fade in and out and you can see it in my logbook reports. The signals reports over the time period of the activation go from 599 both ways to dismal 529 and 229 reports within an hour. This has been the norm as of late too, a lot of my activations lately have had events that would be described as cyclic in nature. I would hear a station call and reply to them with a 599 because they were booming in and then when I turn it over to them to reply, they will be a lot weaker and then you can literally hear them fade out while you watch and then fade back in by the time they turn it back over to me. It is really odd to hear that in real time for some reason.

When I got to the spot I wanted to use for the activation, I was the only one there. So I setup in my usual spot and figured I would start on 17 meters to see how things were and if it wasn’t really happening, I could move down to 20 meters and get the activation easily there. I should have known things were going to be good when my first station of the day was VK3AWA!

Now you need to know something about me here. I thought this was a Canadian station since the call started with a “V”. I work so many Canadians that I have become accustomed to hearing the V callsigns and happily add them to the log. It wasn’t till I checked the QSO map that I realized that he was actually in Australia!!! They (it is an Australian club call) must have had a Yagi antenna pointed at me or something, along with a path opening as the signal reports were really good for a 12 watt transmitter running into a ham stick antenna on the back of a pickup truck. This contact was on FT8 and FT8 reads the signal strength in dB with the software to get the most accurate reading possible to send back. So it isn’t quite as subjective as something like CW where a lot of people (me included) will send signal reports based on how the op sounds to them and never reference a meter one time… So for my little radio to get a -8dB report from Australia had to have help from the atmosphere and probably a very good antenna on their end.

FT8 is a relatively new mode for me. I have normally not done anything other than the two original modes of CW and voice. For me to reach out into a new mode is a pretty big deal and this one works really well, which is why I like it. I am also looking to start messing around with PSK 31 some as well as possibly RTTY if I can figure out how to get the little radio to do it. I think PSK 31 will be pretty easy to master, so I will tackle it first.

The above map shows the performance you can normally expect from a band like 17 meters. Notice there is practically no contacts inside of about 600 miles other than two oddities here in Georgia? That is because of the antenna and the ability of 17 meters to have a pretty decent take off angle and also to reflect off the ionosphere easily. This garnered me a ton of contacts in the pacific northwest as well as the Atlantic north east and a scattering around the country to include Utah and southern California. Then there is the EU… I made several contacts with France and Germany today. That has been a little unusual lately for me and my system to be honest so I was stoked to see them in the log.

But this trip did something that I had not done before that I can remember… It netted 7 Canadian QSOs alone, combined with the other DX calls I technically activated today with only the DX contacts! That has to be a personal first.

I started with a DX call and finished with a DX call. How cool is that? It was a great day for radio and I really enjoyed using the sBitx with the new V3 firmware. The radio works so much better than the previous firmware and the FT8 is a breeze in the native radio setup. It you are into smaller radios and smaller companies and the idea of help from a collective of literal geniuses that willingly share their information with you, then this just might be a radio you will like. It is for me, I have had so much fun with it that it is hard to understand how I got along without it before…and the people over at HFSignals dont even know who I am…haha.

Got an activation in right before 2400 UTC with the deer!

It had been a week since I had been able to activate a park…

Even though I had to work till nearly 22:30UTC (5:30 PM local time) in the machine shop, I finally just put a radio in the truck and went to my local park K-2169. I get there just before dark and hurriedly put up the 20 meter ham stick and I ran out the 20 meter radial I have been using lately and also ran out the two 30 meter radials as well as I had planned to hop on 30 later if 20 didn’t do any good.

I get on the air and it is dark enough that I cant easily see the logbook now so I setup my pocket flash light in the truck for a lamp to work by for the duration of the activation. If you look in the above photo, you can see it wedged in the seat on the other side of the center arm rest. By pointing it at the ceiling, the light would bounce back down and be a nice soft light that was easy to use for the activation. This is an old photography trick I learned a long time ago for using lights with people in photos.

I sat in the truck since it was in the 40s at this point as well. I did plan ahead and I ran the heater wide open while I was setting up the antenna so the cab would be good and warm when I shut down the truck engine so I could hear easier and to also eliminate any possible alternator whine or computer RFI that might be coming from the truck electronics.

With the sun setting fast I wondered if 20 meters would hold up long enough to secure the activation. Well, it did hold up just fine and then some. In fact it held up so well that I never changed over to 30 meters. I started on FT8 while I was getting my logbook ready in the HAMRS app on my phone and my spot on the POTA website and such. I normally don’t have much luck if I start on FT8 for some reason so today wasn’t any different. I made one QSO, yeah… one in like ten minutes. So then I moved over to CW and things immediately picked up.  It was awesome as I had a run of about 15 contacts in about that many minutes. I like these kinds of rates where it is manageable and basically as soon as I finish one QSO another calls in to start, sometimes there will be a small “pileup” of sorts where two or three might call at once but that is usually all.

So with the activation officially secured I moved back over to FT8. I really wanted to work this mode some to see how it would perform with the new software compare to the version 2 software. This time things went better as it has happened the last few activations too. I am going to go out on a limb here and say that it is probably because I am spotted on the POTA site at this point and most of the QSOs are POTA contacts instead of just people answering my CQ calls. As for the version 3 software, I love the new interface and functionality too. It works a lot better than the version 2 software did and it is easier to use as well. I also really like the native interface over the web GUI version. The GTK (I think this is what he calls it) seems to run smoother than the web version for me. It is also easier to adjust controls too as you simply touch them and the multi-function knob now controls that function. The auto logging function is still a little buggy in that it doesn’t seem to auto-log each QSO, but it isn’t a problem for me as I log them manually anyway too. I figure this will get solved in an update at some point so I dont worry about it for now.

Once I finished the activation, I go out of the truck and find all sorts of stuff that I don’t get to see if I leave before dark. This is the frisbee golf course at the park and I am in a remote parking lot that serves this course, well the park has an abundance of deer in it and apparently they were about to have a meeting or something because they were all around me when I lit up the tree line with my flash light! I also saw that the moon was really interesting so I grabbed a photo of that while I was at it to share with all of you as well. Note that this is done on my iPhone too, this thing has some sort of lowlight mode and does this long exposure trick to get good photos in poor light. I was impressed. You can see me hamstick in the corner of the photo too…haha.

So, with 30 QSOs in the log, I called it quits before the UTC day rolled over and packed it all up and went home. Thanks for following along and I look forward to sharing the next one!

73

WK4DS